It all started with a batch of corn flake cookies I made for Christmas this year. A simple thought transformed into a theme for my 3-year-old’s birthday party . . . .
My family has been making corn flake cookies for as long as I can remember. These treats are similar to a rice crispy treat made with corn flakes and just as delicious. The original recipe calls for forming the cookies into a wreath, much like Lauren shows in her tastesbetterfromscratch.com blog, however we have gotten in the habit of merely making ball shaped cookies perhaps since we are more interested in eating the cookies than making them look pretty.
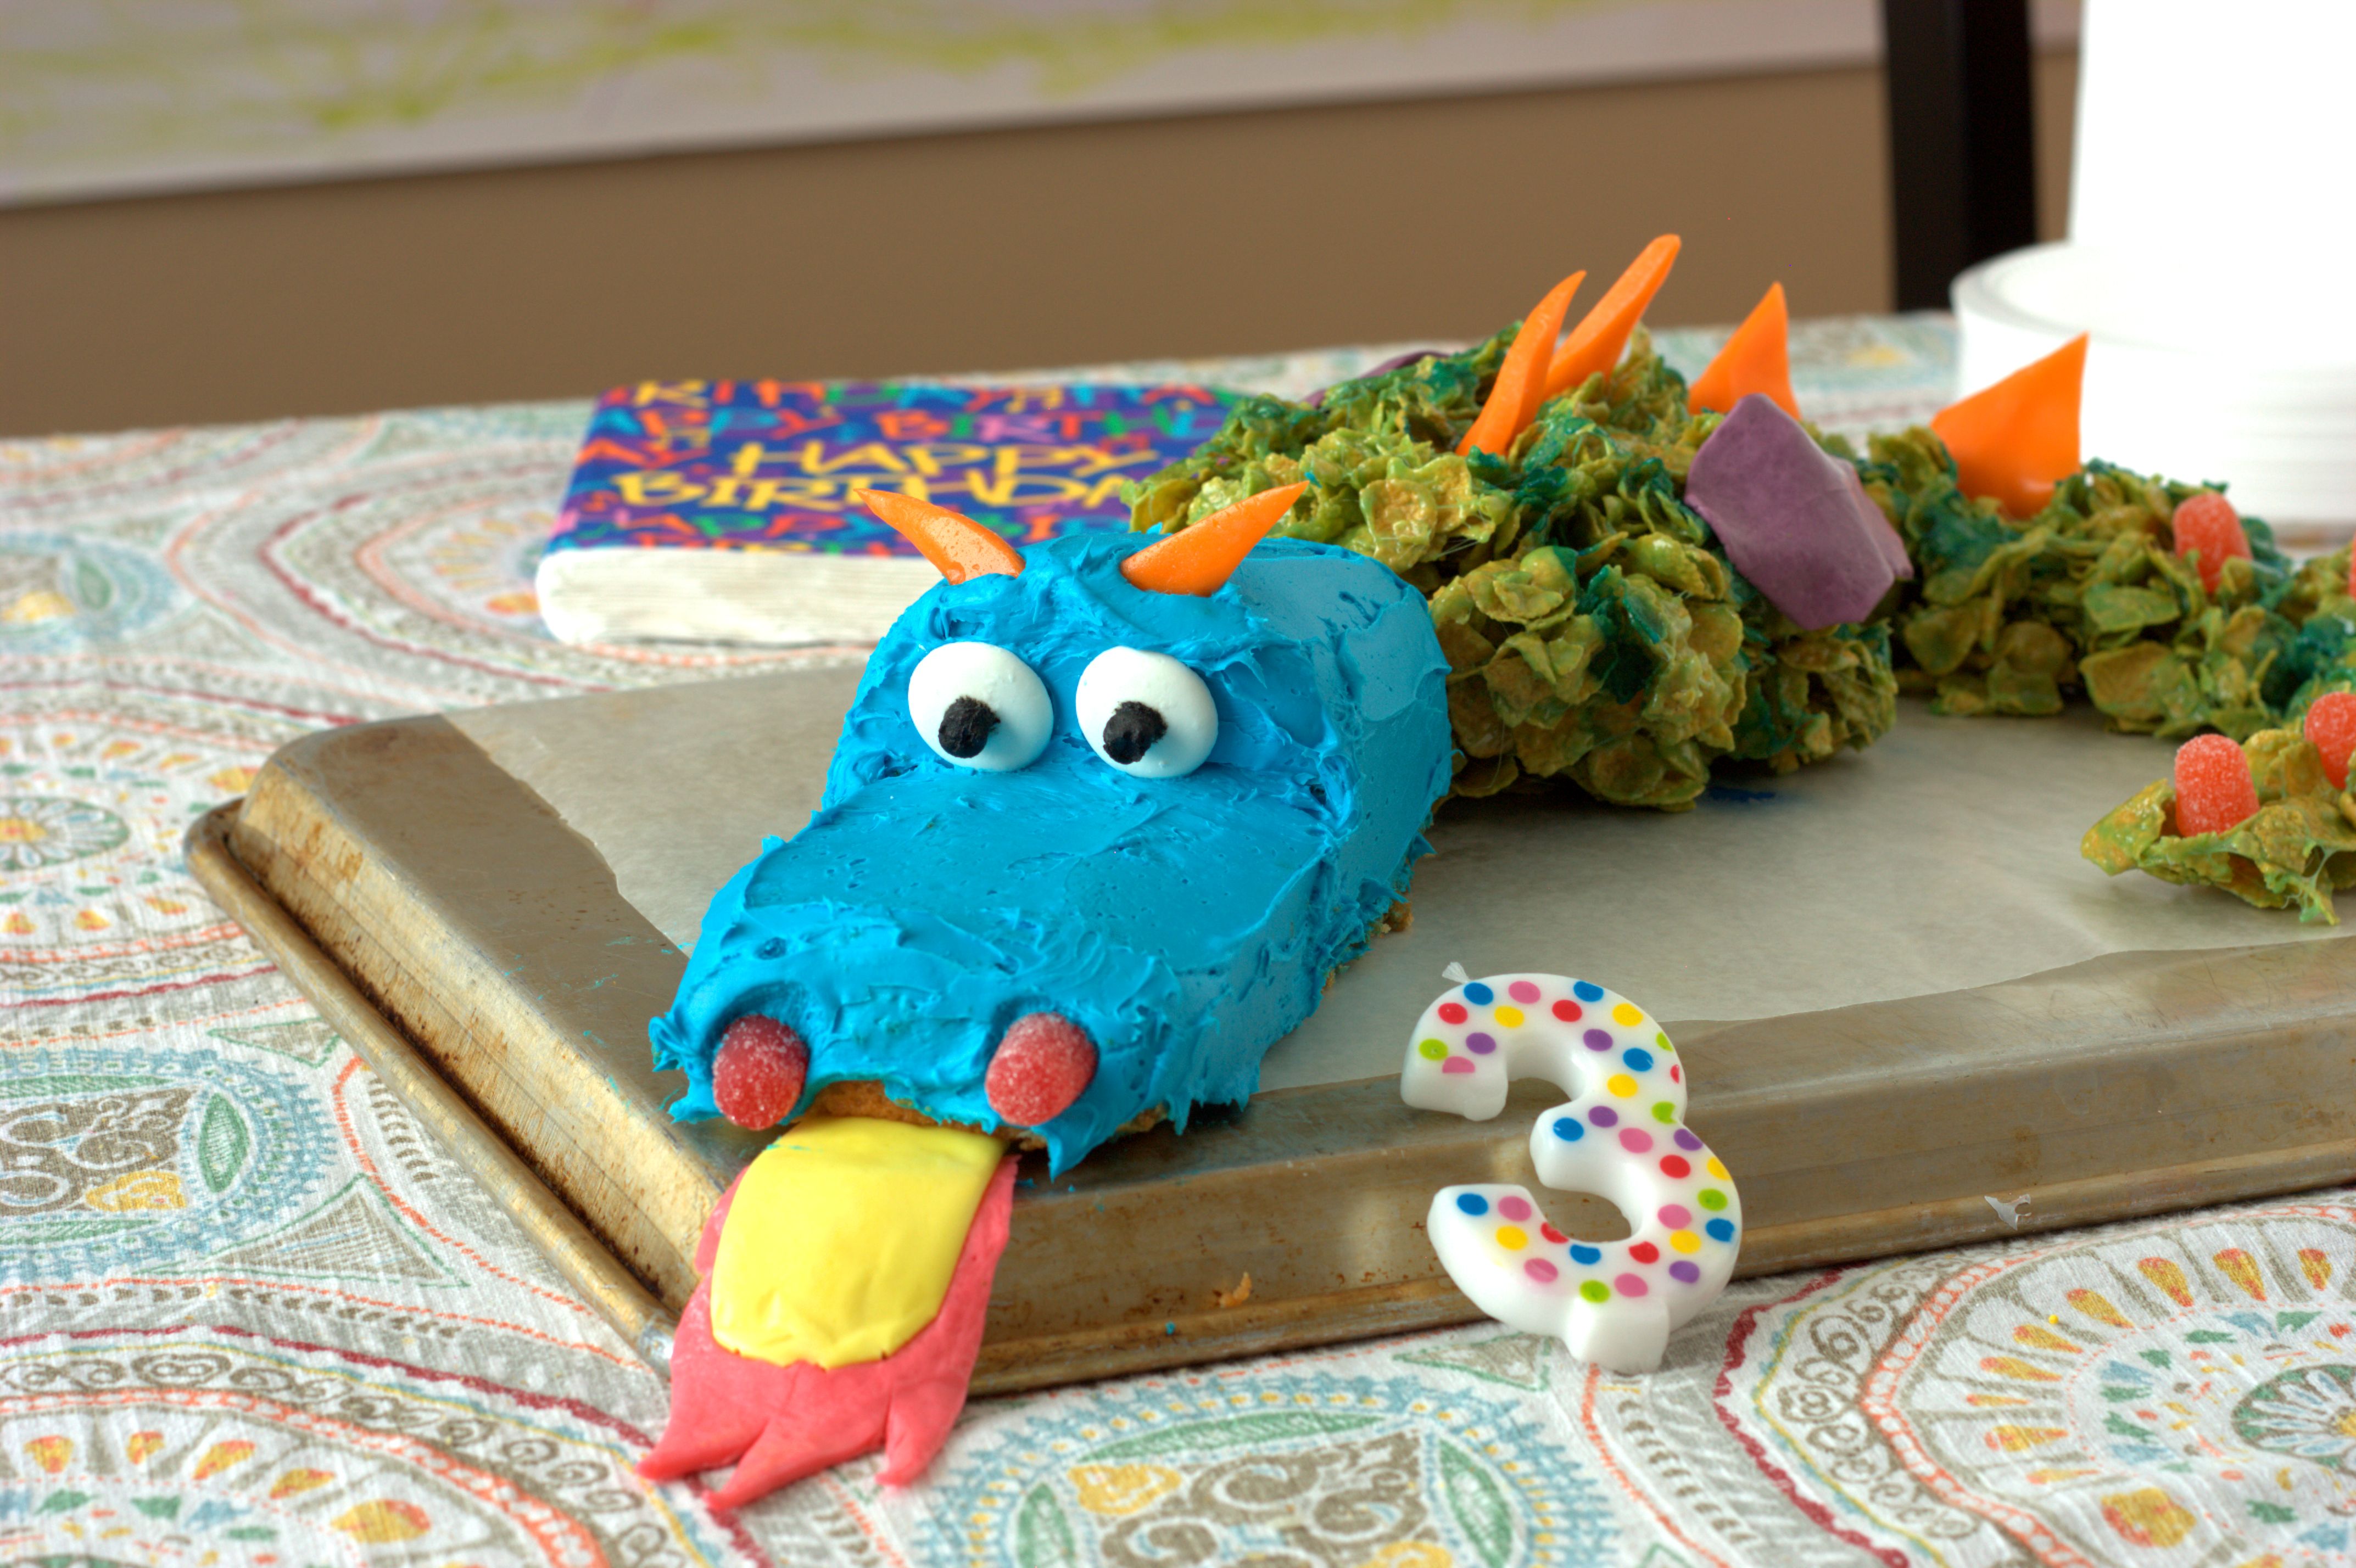
As I made them this year I thought that the texture would look great as the skin of a dragon for a birthday cake. I immediately got excited about a no bake dragon cake – cut down on birthday party prep time? Sign me up! While I had some ideas, I scanned Pinterest for some decorating ideas and came across another easy dragon cake posted by parents magazine. Their recipe calls for cutting a Bundt cake into multiple pieces, rearranging, and frosting in a new shape. My plan was to create something even more simple.
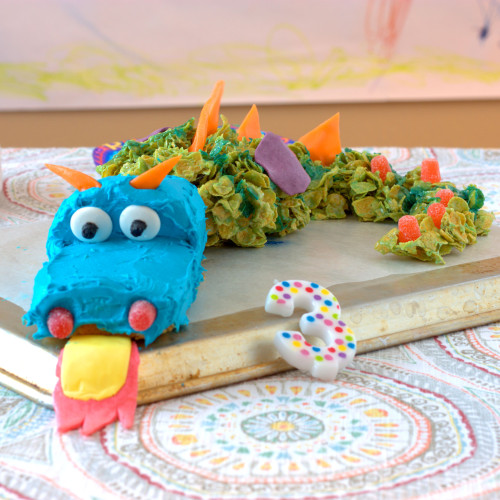
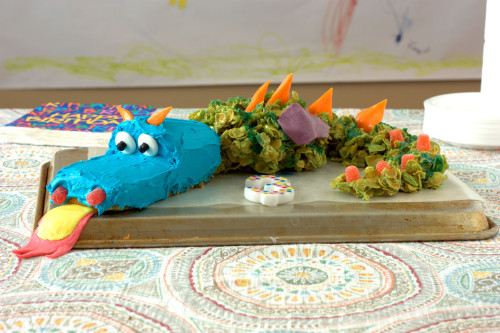
I decided to use the corn flake cookies to create the body, a pre-made pound cake to make the head, and a variety of candy for decoration. First, I prepped the candy additions. I used two white candy melts for eyes by dotting the centers with some black frosting and let the frosting dry so that it did not drip.
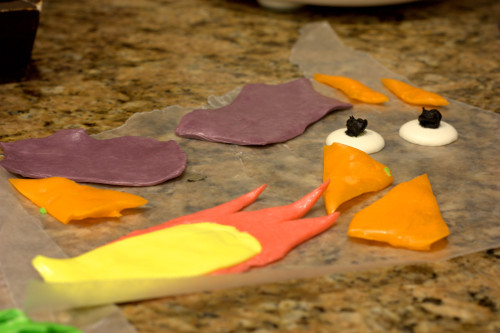
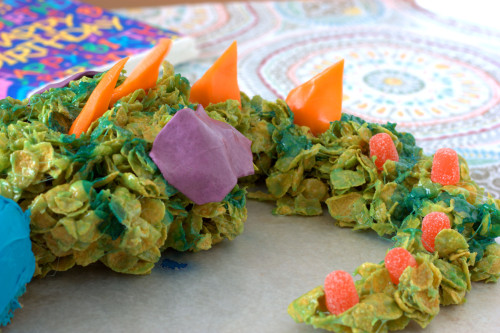
Next I used 4 pieces of laffy taffy (two purple, one yellow, and one pink) to make wings and flames. I rolled out the laffy taffy using a rolling pin to the thickness and width I wanted, then cut shapes using a pizza cutter. Similarly, I slightly flattened four orange air head candies and cut them into triangular spikes. I decided to use sugary candy as the decoration pieces since they add great color variety and don’t melt as easy from the residual heat in the corn flake cookies like a chocolate coated cookie or candy (I made a mock up earlier in the month with sliced cookies didn’t work as well as the candy).
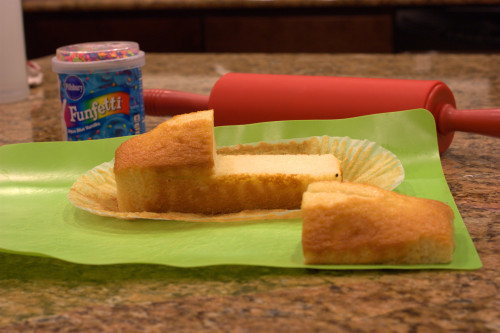
I sliced the pound cake to make the shape of a dragon head,and then frosted it.
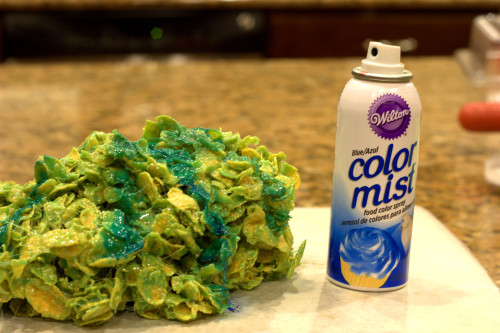
I made the corn flake cookie batch, formed it into a mound and curving tail, then added stripes with spray.
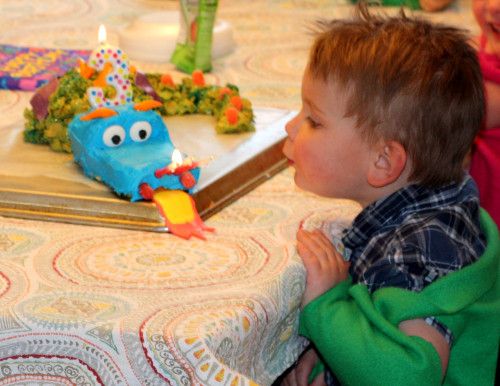
I placed the frosted head near the corn flake cookie body than added dragon details with my premade candy shapes. The result was a cute no bake dragon cake that delighted all the party attendees. I can’t believe I actually made this the same day as the party!
A variety of kid activity conflicts meant that I hosted the party mid-afternoon. In lieu of a meal I served light snacks:
- Swords and Shields (Cheese Sticks and Crackers)
- Fire Breath Mix (purchased Cajun Trail Mix)
- Dragon Horns (Bugles)
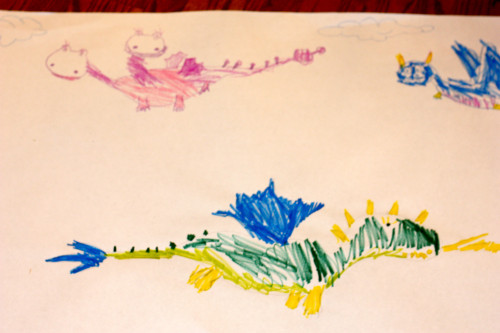
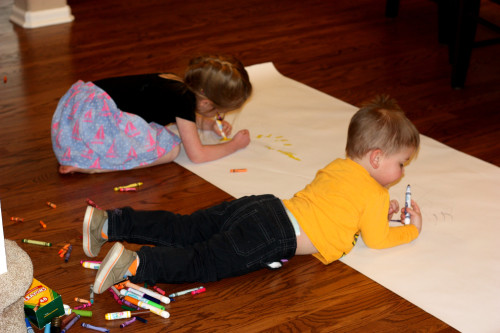
To add to the dragon theme for the party I went with simple games and decorations that my kids helped me prepare. Both of my kids are into doing crafts, so I thought planning for the party would be a great way to spend time together. We made two large murals of dragons,
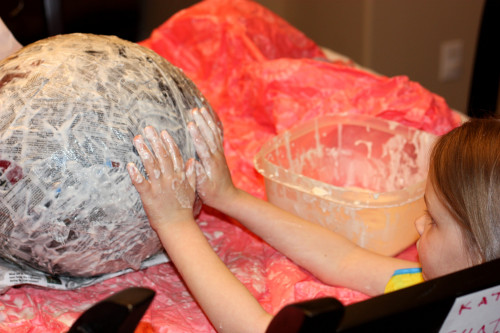
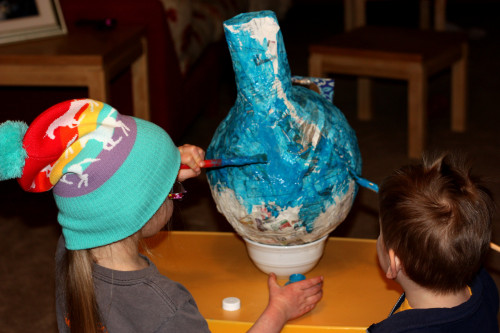
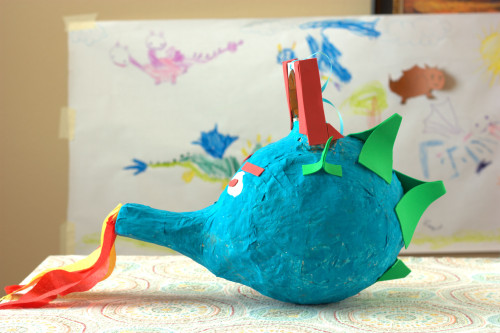
made a pin-the-tail on a dragon, and – drum roll – made a piñata. They helped cut the paper, coat the form (a 12-inch balloon and a snout made with a paper towel roll cut in two) with paper mache (the paste is equal parts flour and water) and paint.
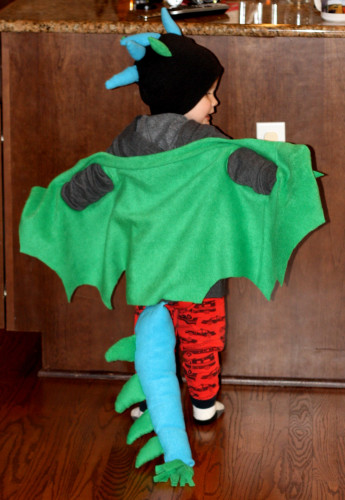
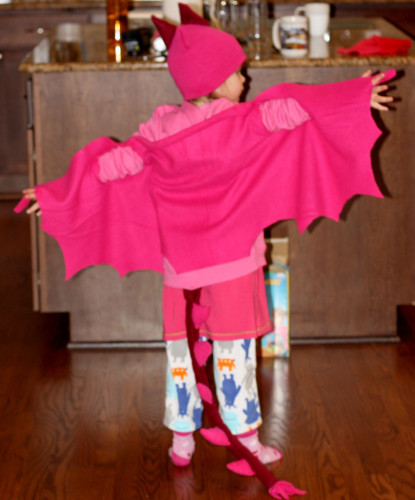
The last touch for the party was a pair of dragon wings for every kid. Both my kids asked for dragon costumes for Christmas, with specific colors. I came across a no-sew dragon wing idea from Bren on Brendid.com that was so easy, it really made my dragon costume gifts simple to do. Since I had enough leftover fleece from that project it was a pleasure to make wings for our party guests. They were also a good excuse to get the kids to run around and burn up their candy and cake fueled energy!
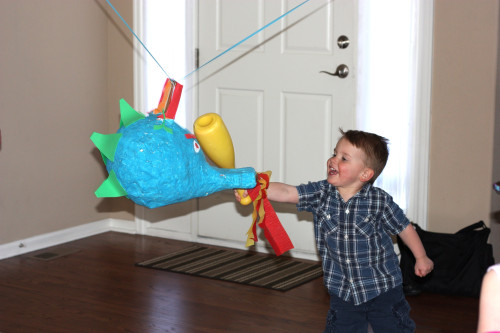
 All the attendees had fun with the games, so much so that it is hard to say if the piñata or dragon wings were the bigger hit. And I can’t forget to mention that the birthday boy loved his no bake dragon cake!
No Bake Dragon Cake
2 white candy melts
Black frosting
4 pieces of laffy taffy (2 purple, 1 yellow, 1 pink)
4 pieces of orange air head candies
12 ounce premade pound cake
1 jar of blue frosting
4 tablespoons butter
1 (10oz) package of marshmallows (40 count)
6 cups corn flakes
10 drops green food coloring
Wilton’s Color Mist food color spray, blue
6 -8 gum drops (2 red, 4-6 orange)
First, I prepped the candy additions. I used two white candy melts for eyes by dotting the centers with some black frosting. I let the frosting dry overnight so that it did not drip.
Next I used 4 pieces of laffy taffy (two purple, one yellow, and one pink) to make wings and flames. I rolled out the laffy taffy using a rolling pin to the thickness and width I wanted, then cut shapes using a pizza cutter. Similarly, I slightly flattened four orange air head candies and cut them into triangular spikes; set aside.
Cut the pound cake to make the head by slicing down the center halfway and then cutting from one side in widthwise to remove one quarter of the cake. Save the small piece for another use. I find I get a cleaner look by first frosting with a crumb coat. I spread a layer of frosting on to seal in the crumbs, then put the cake in the freezer for ~30 minutes and then remove from the freezer and put a final layer of frosting; set the frost cake aside.
Lay waxed paper over the surface you want to use to serve your cake. Next make the corn flake cookie batch by melting the butter over low heat, then adding marshmallows and slowly melt, stirring often. When melted, add green food coloring, stir until an even green color is achieved, then and corn flakes. Stir quickly until the corn flakes are coated, then place on the waxed paper by forming a large mound with a medium size tail curving behind it. Then, add blue stripes by spraying with the Wilton’s Color Mist food color spray. While the corn flake cookie batch is still sticky, use the orange airhead spikes to create a ridge down the back, then transition to orange gum drops down the tail. Stick one wing on each side of the body. If necessary, use tooth picks to prop up the spikes until ready to serve (the residual heat may cause wilting).
Place the frosted head close to the corn flake body, and then gently place the flame under the snout, use two red gum drops for nostrils, and finally add the eyes and two more small spikes for eyebrows. Store lightly covered until ready to serve.
Note: I made this the same day as the party to keep the corn flake cookie part soft, since I did not have an air tight container big enough to store the entire cake. I loosely covered in wax paper and plastic wrap.
(749)