
Rocky Road Bars – Cookies that are a crowd pleaser!
Tag: nuts
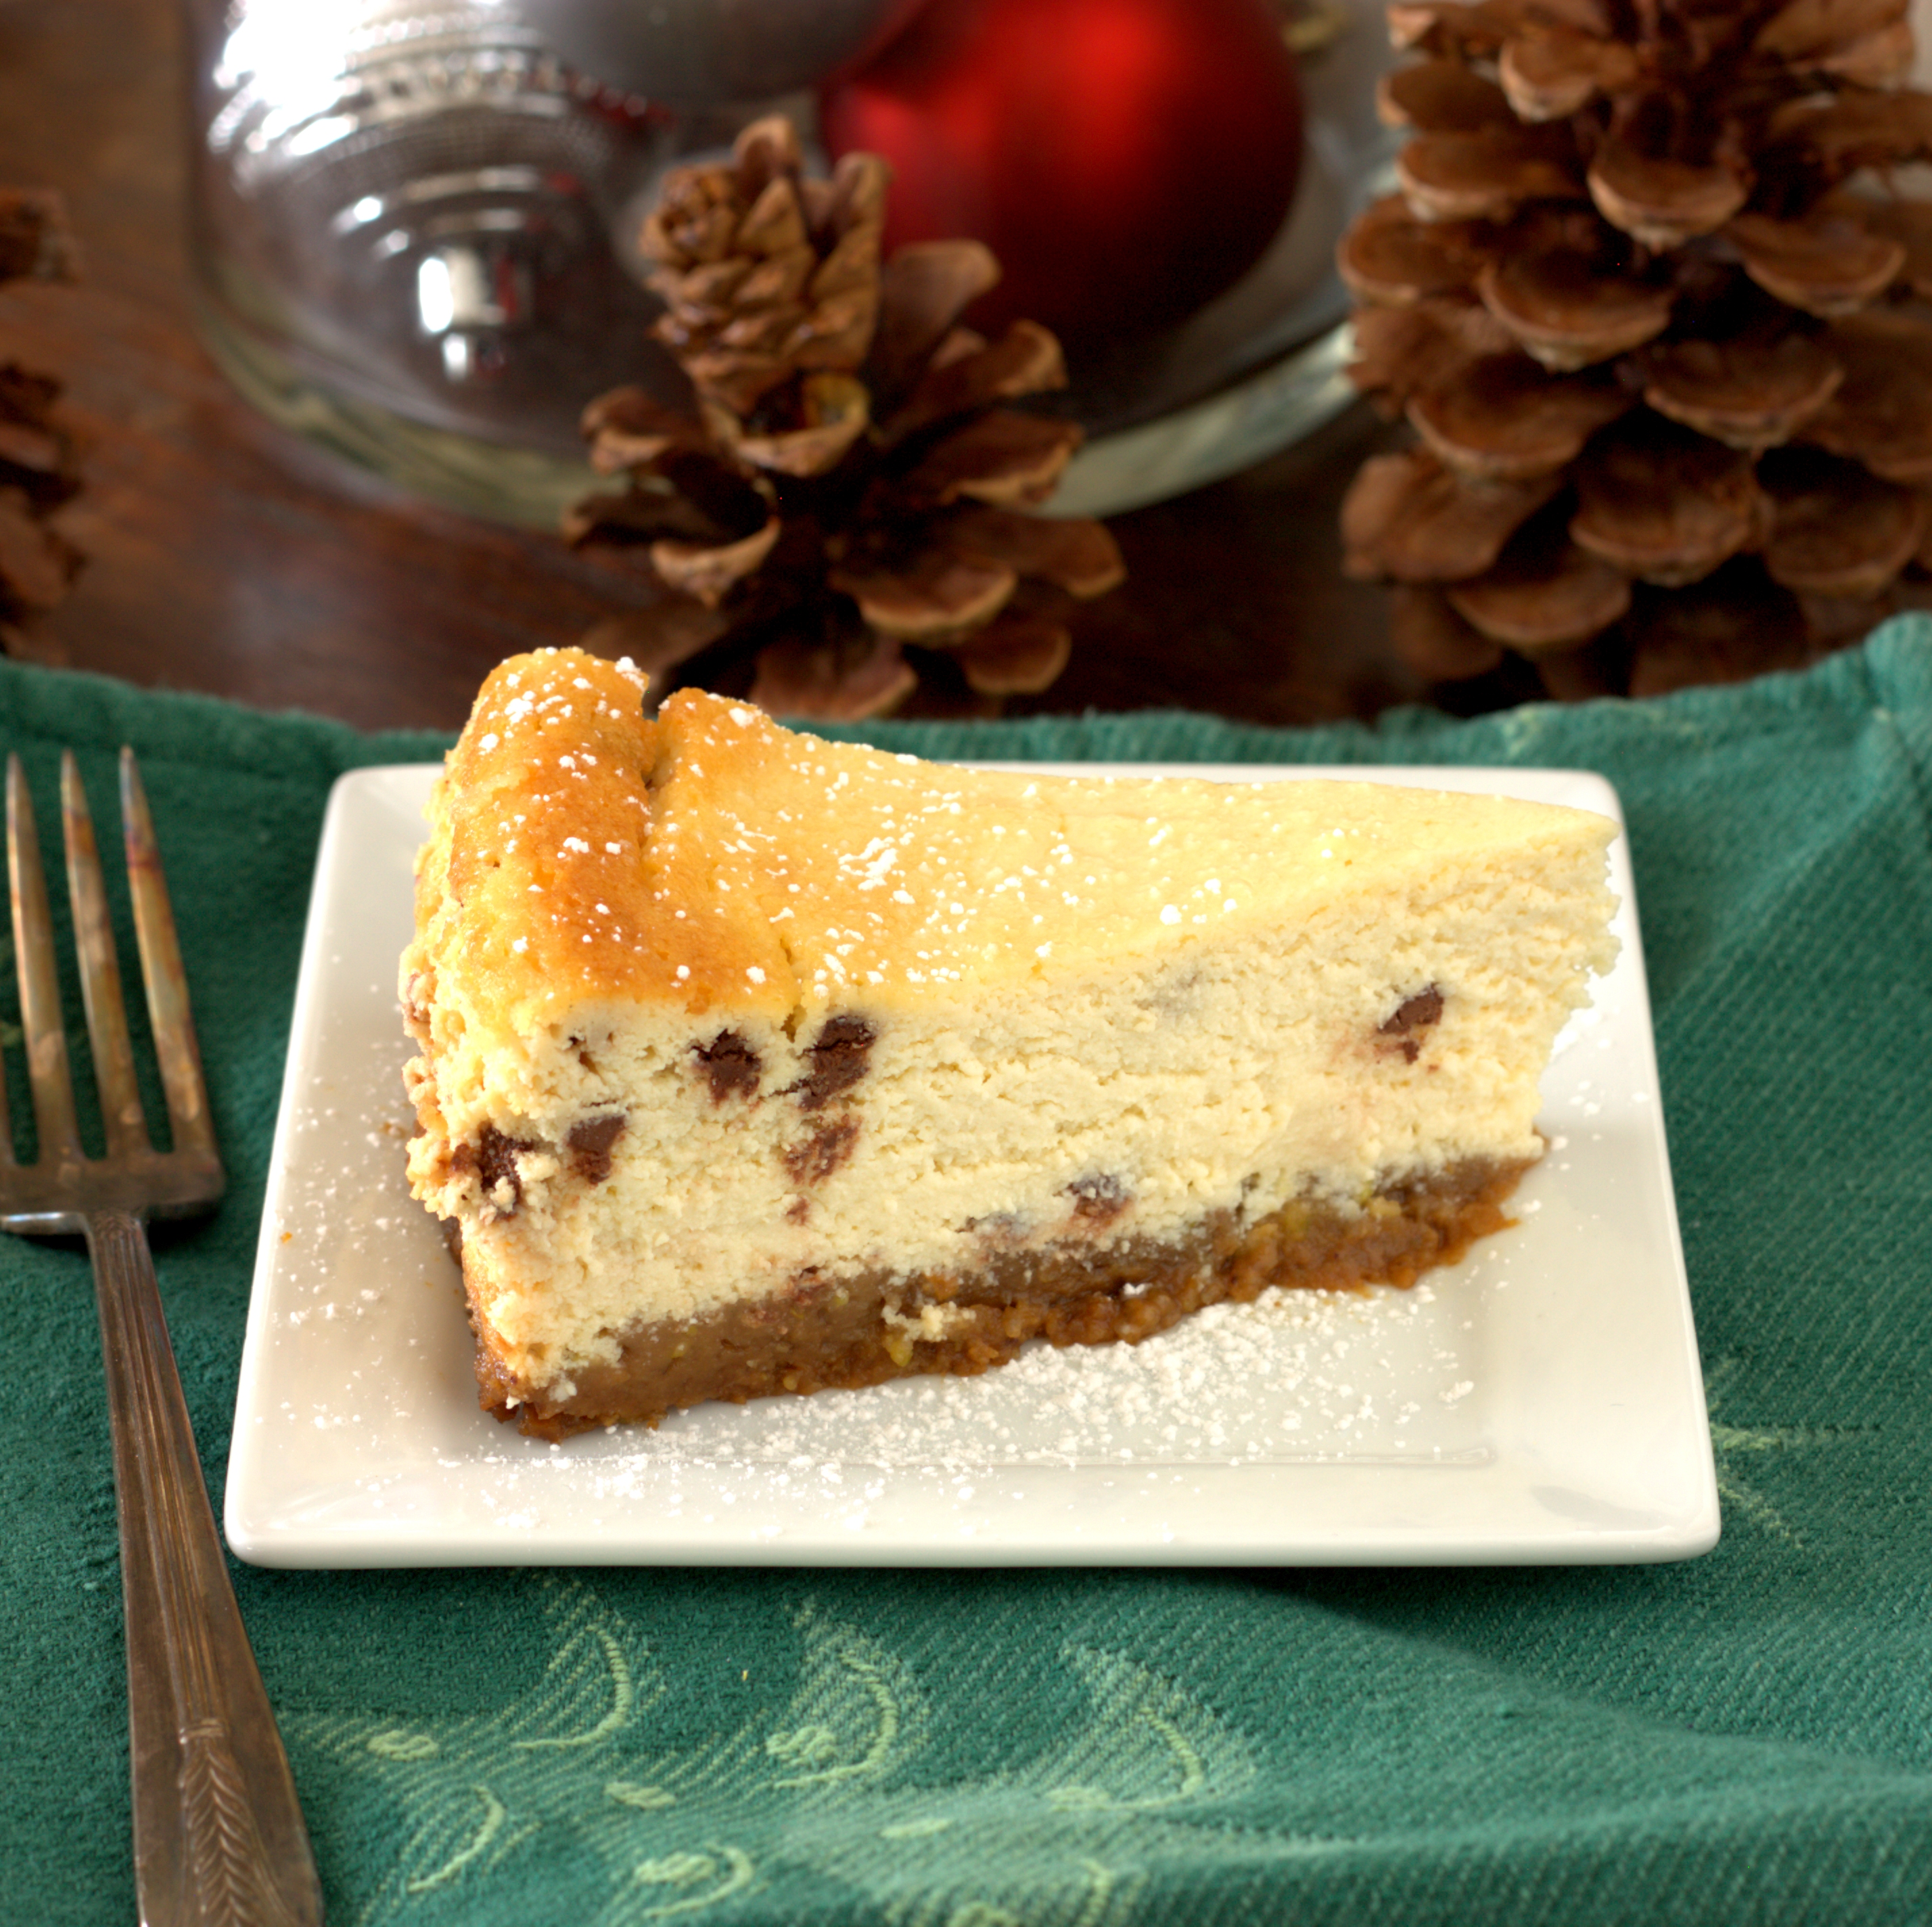
Cannoli Cheesecake
At a gathering just before Thanksgiving, we were discussing everyone’s favorite pie. My husband brought up his love of cheesecake and cannoli, rather than the typical turkey day offerings. The table threw down a challenge that I readily accepted – create a cannoli cheesecake. While a quick search on the internet brings up…
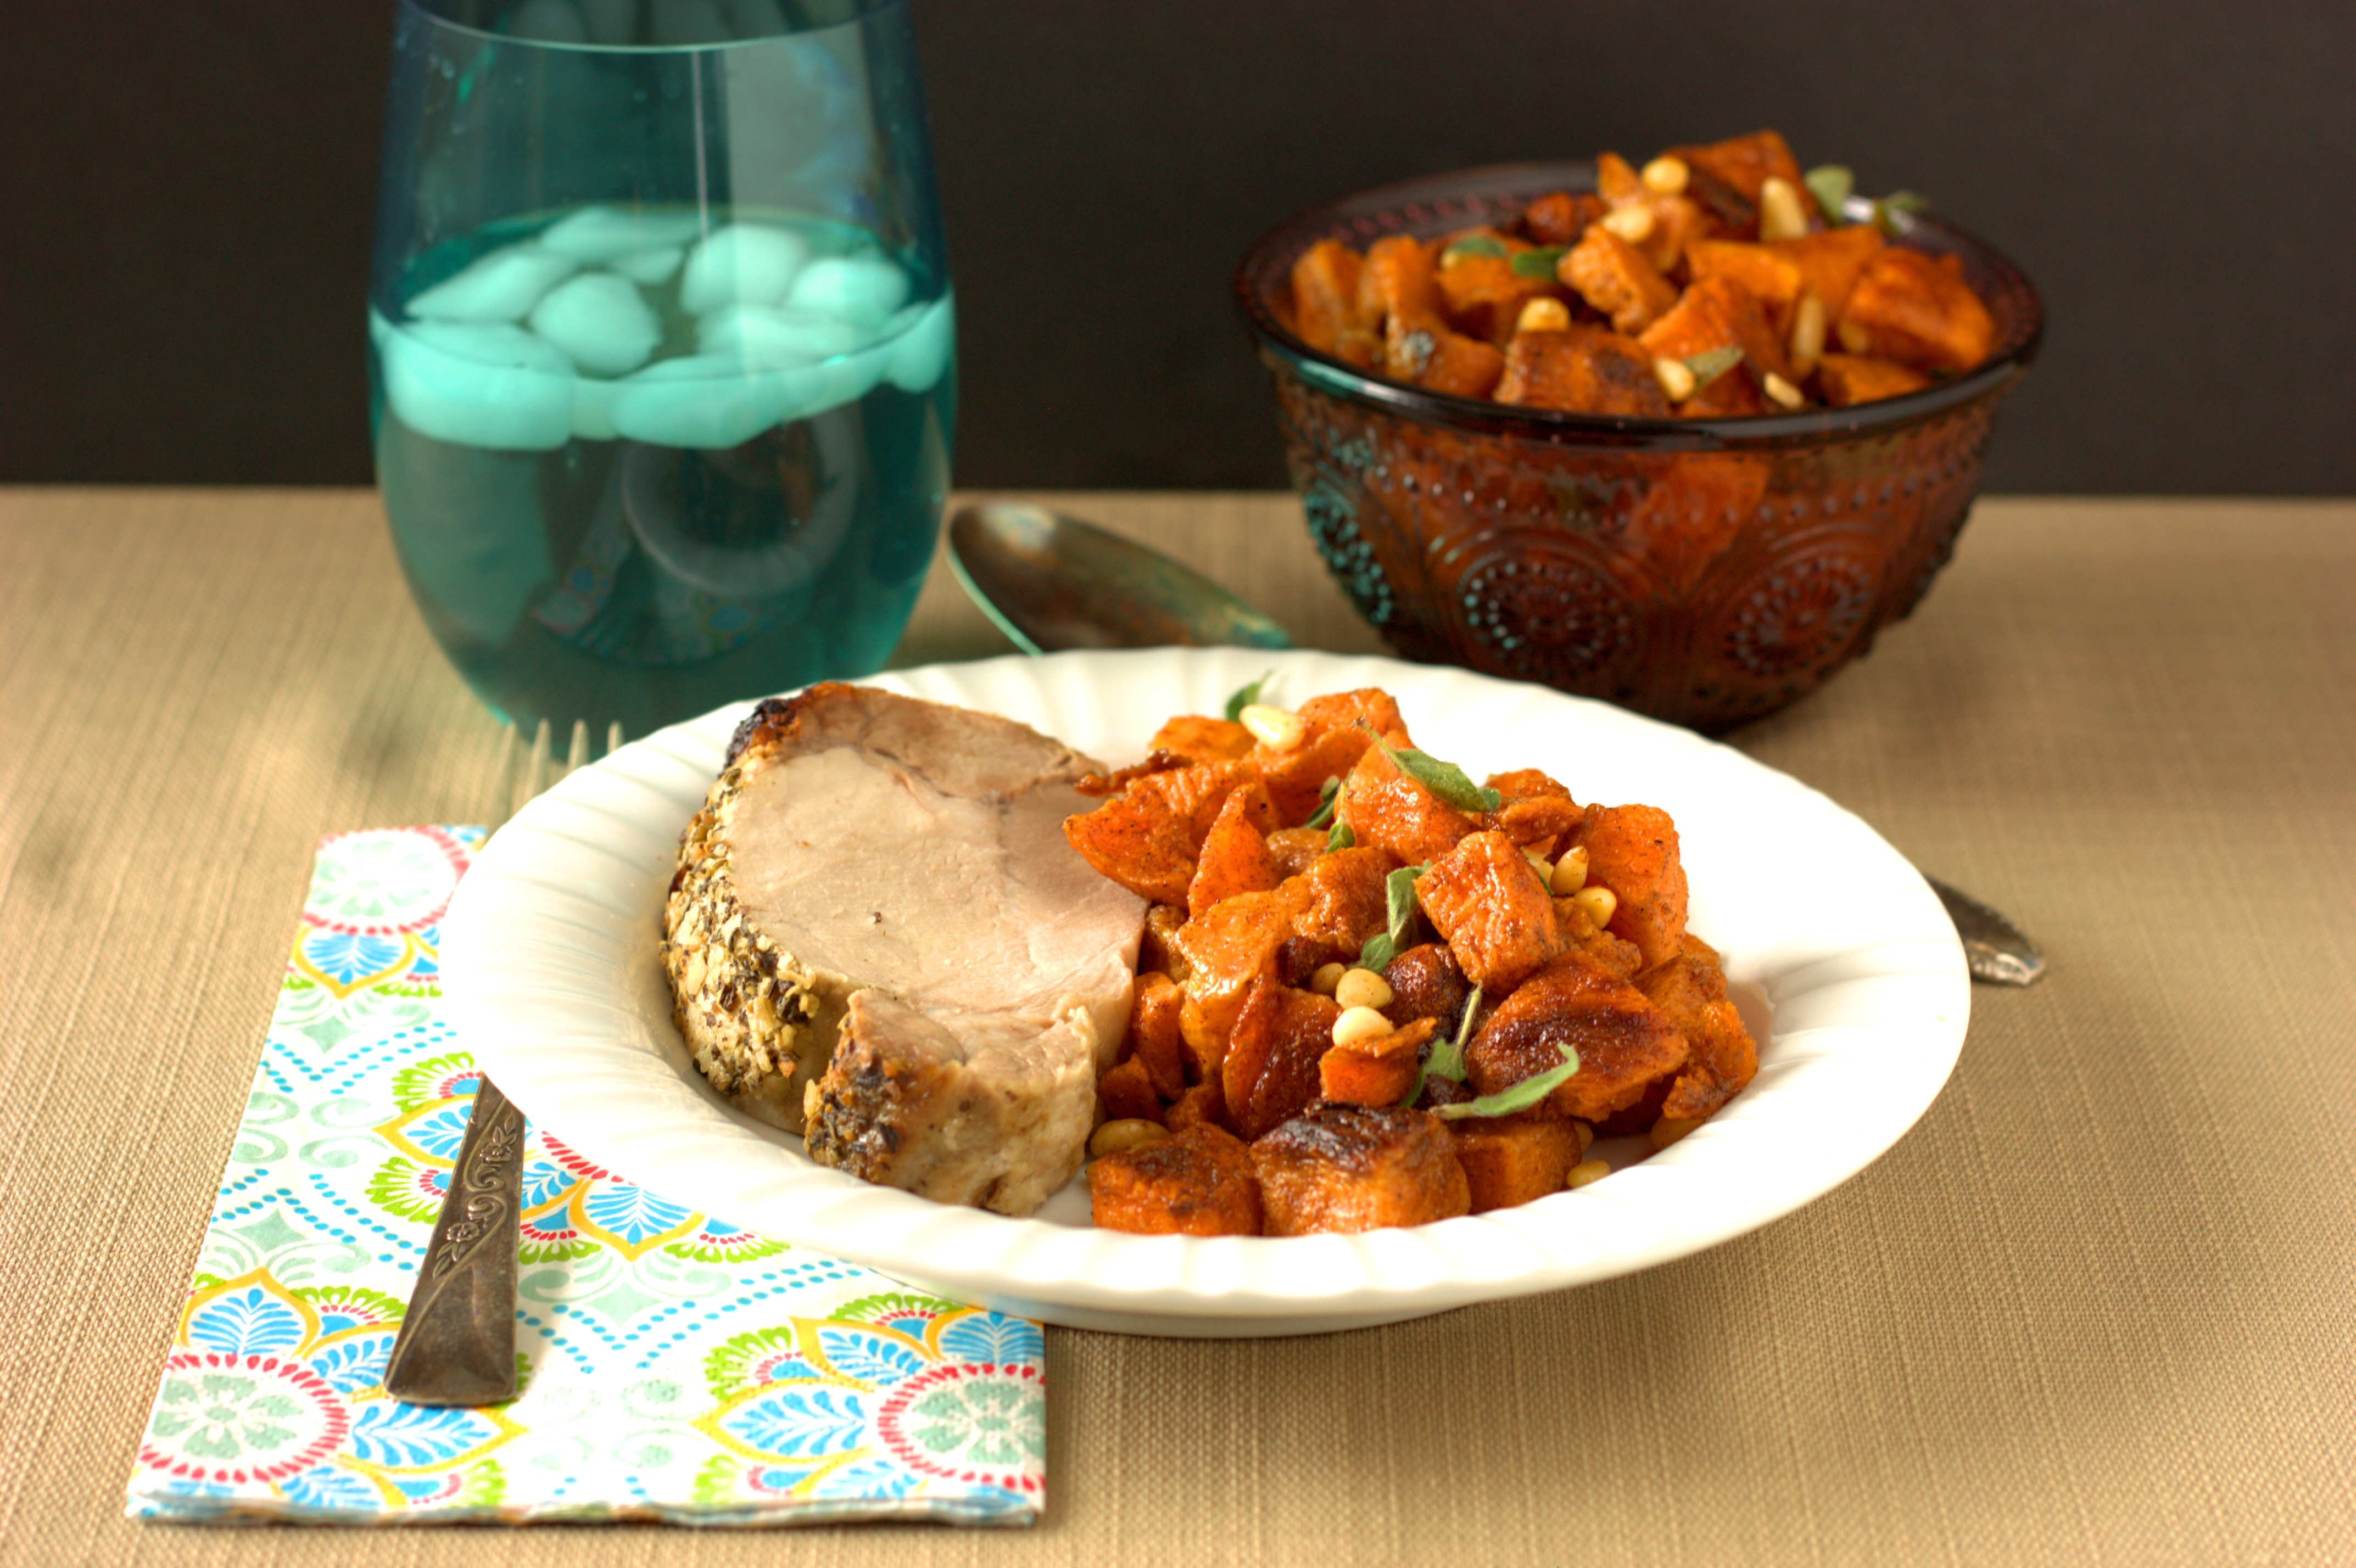
Garam Masala Roasted Butternut Squash
I love butternut, but I despise peeling and chopping it. That is why I joyfully bought pre-peeled and chopped butternut squash from Costco in a handy 2 pound tub. Prep time was instantly reduced by 85% and I could focus on how I wanted to flavor my dish, rather than how to safely…
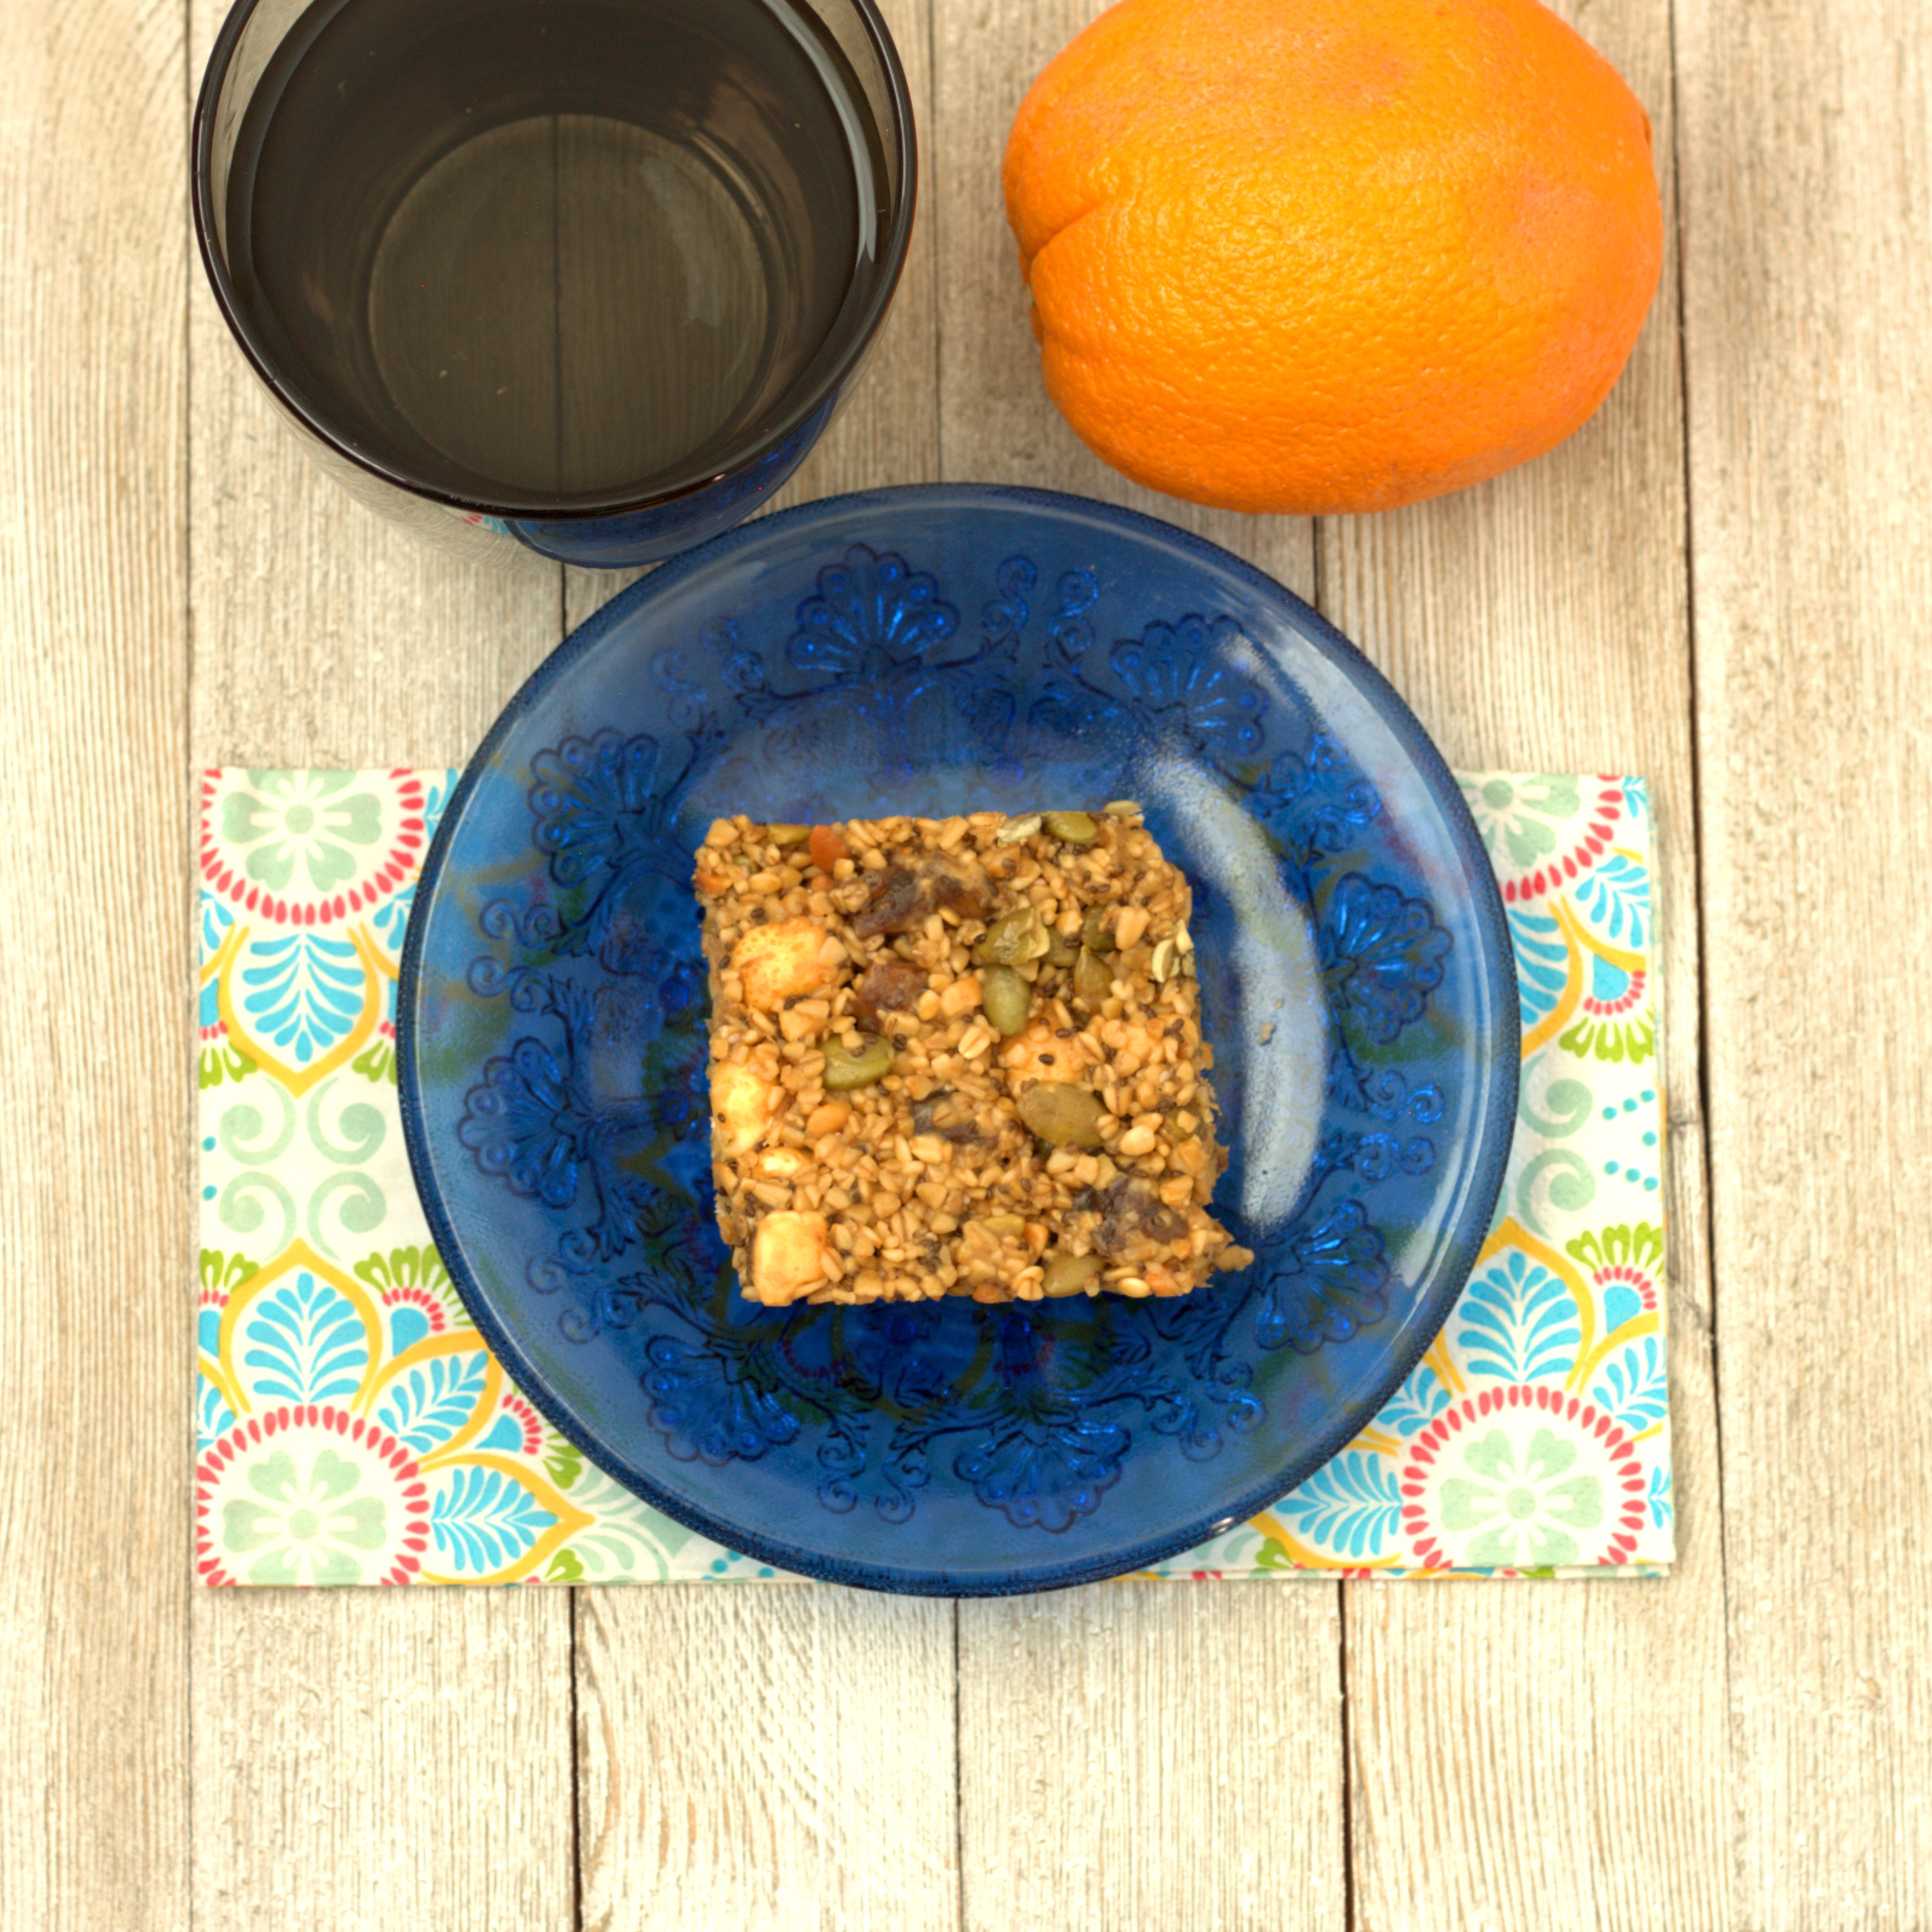
Loaded Peanut Butter Granola Bars
If given a choice, my children would eat peanut butter every day for breakfast. On top of the great taste, they enjoy getting to make breakfast on their own (if you can really call smothering a piece of bread with peanut butter cooking). Needless to say, we dissuade them with other, more filling…
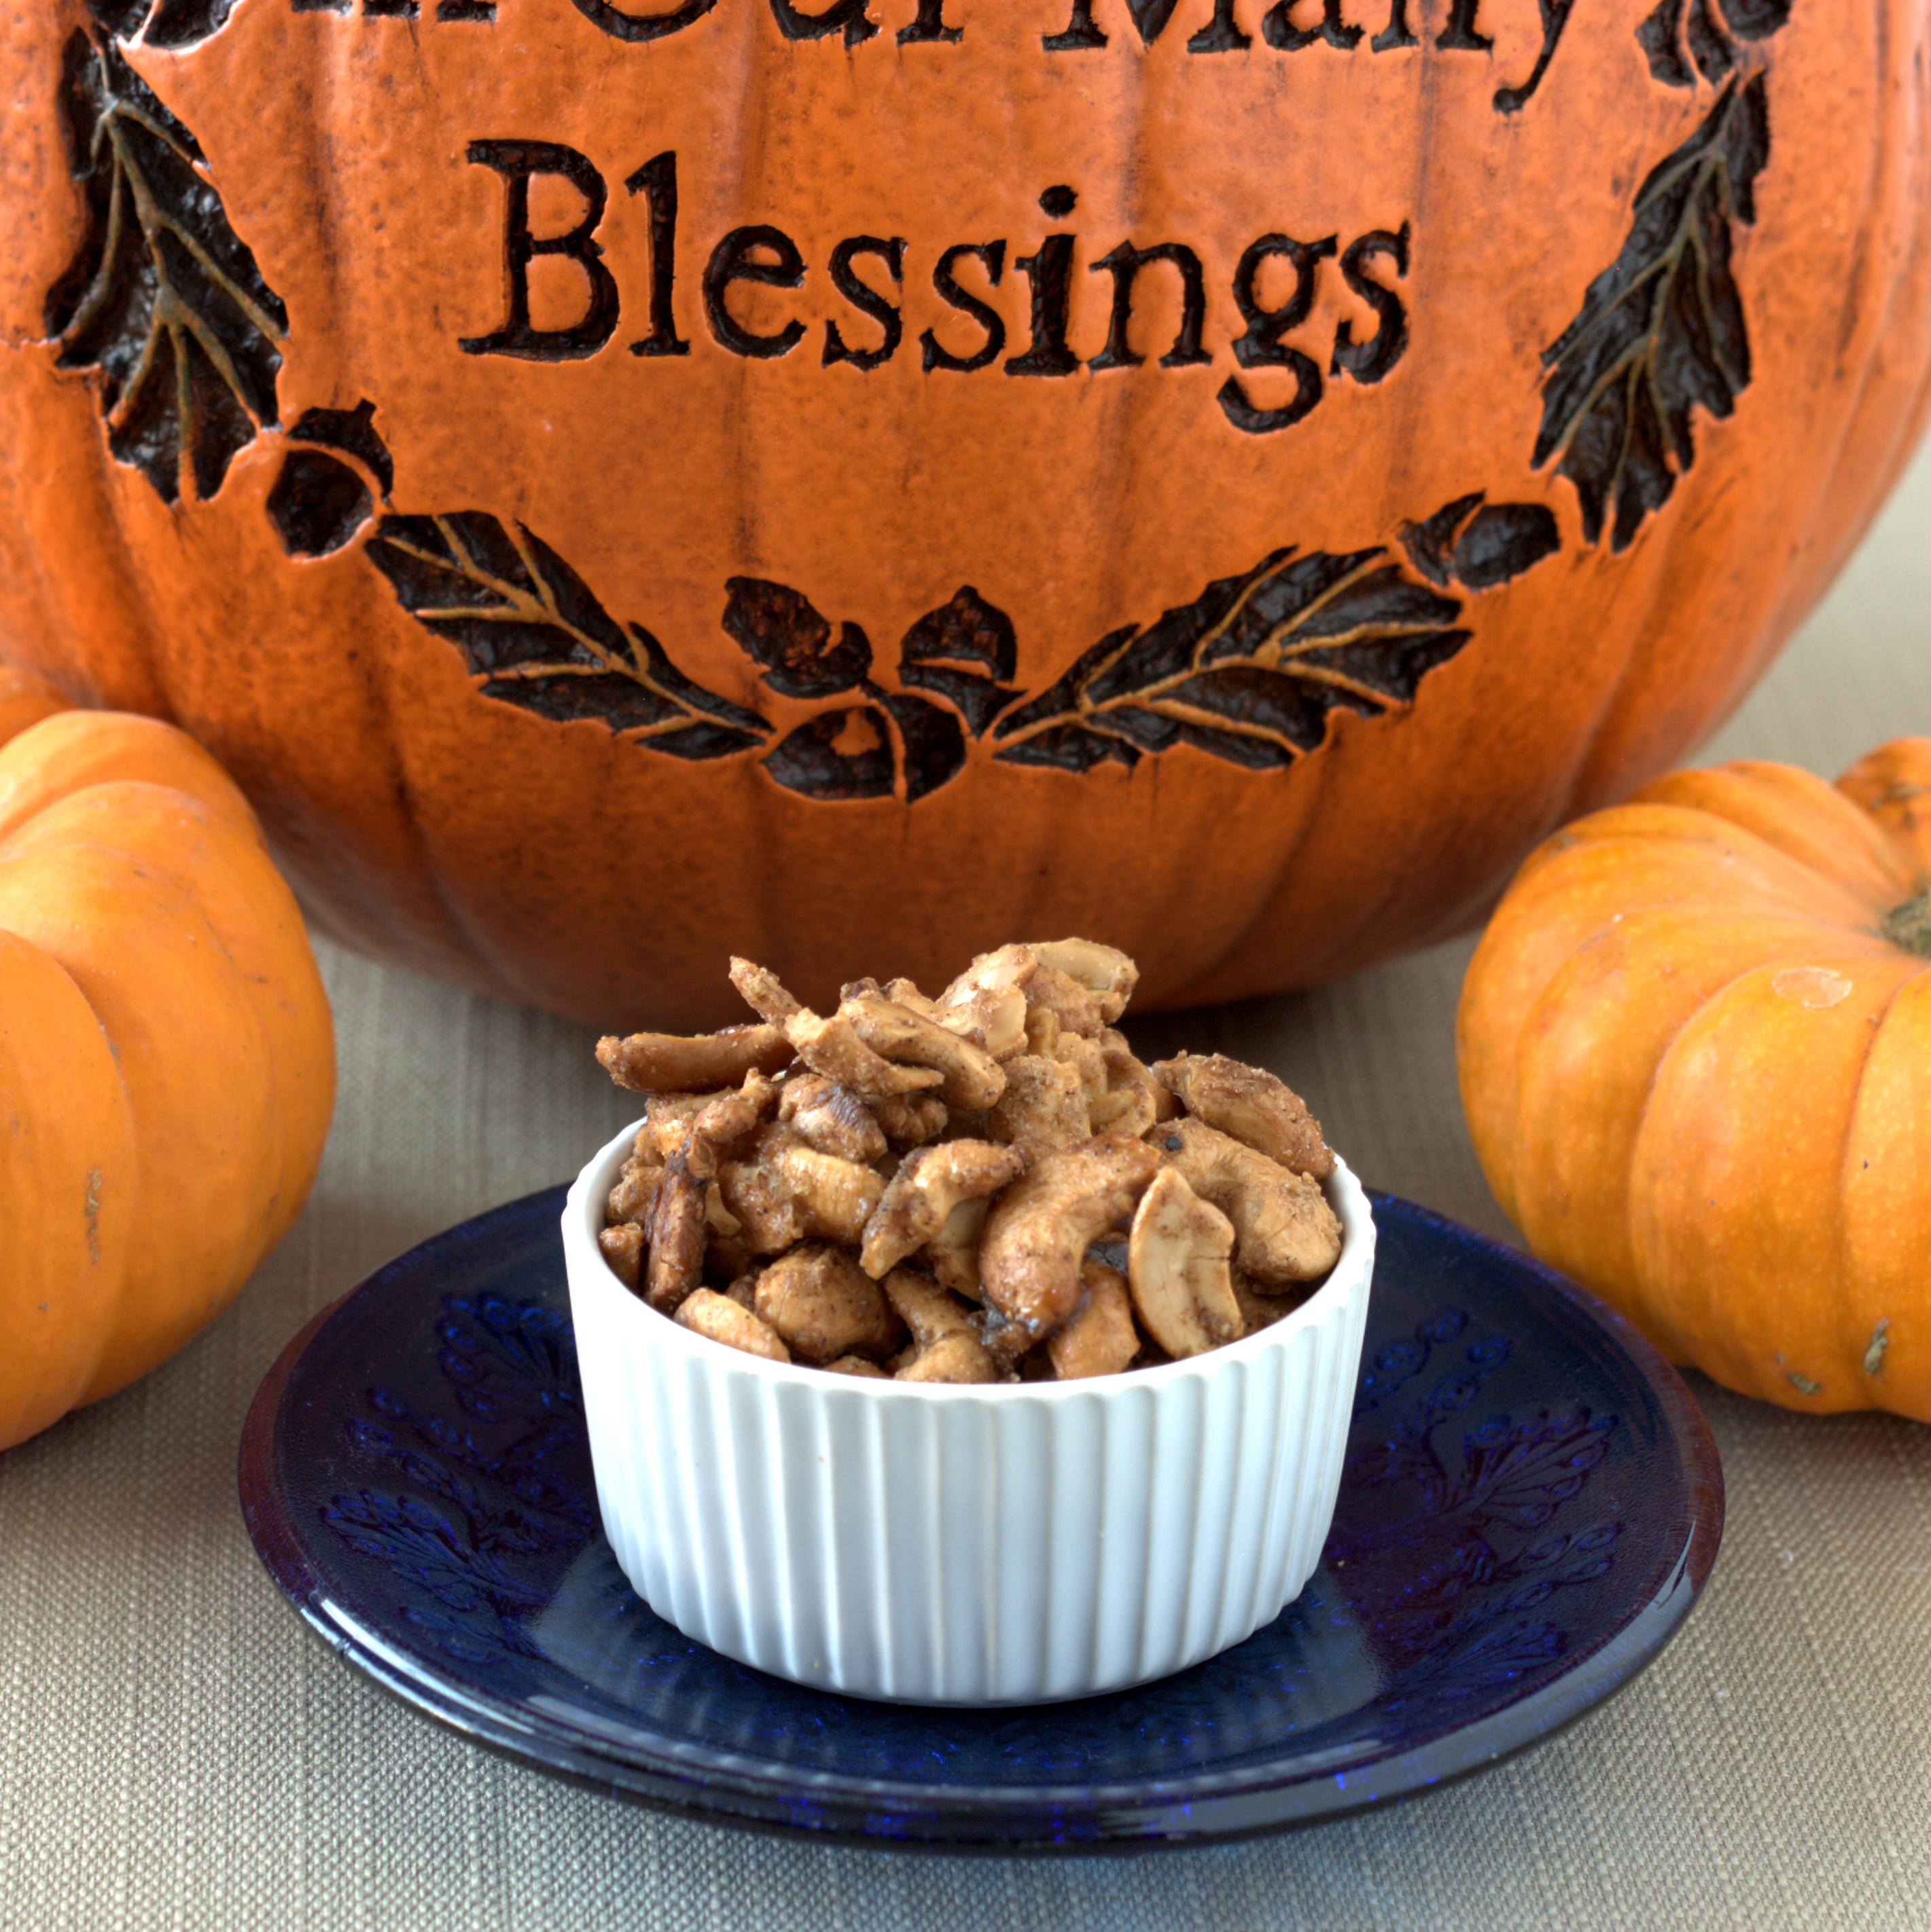
Maple Cashews
At family gatherings, my grandfather would always set out a bowl of cashews for a snack. My guess is that this tradition started my love of cashews, which is why I tend to be the offender who will steal them from the mixed nuts if given the chance. I use them periodically in…
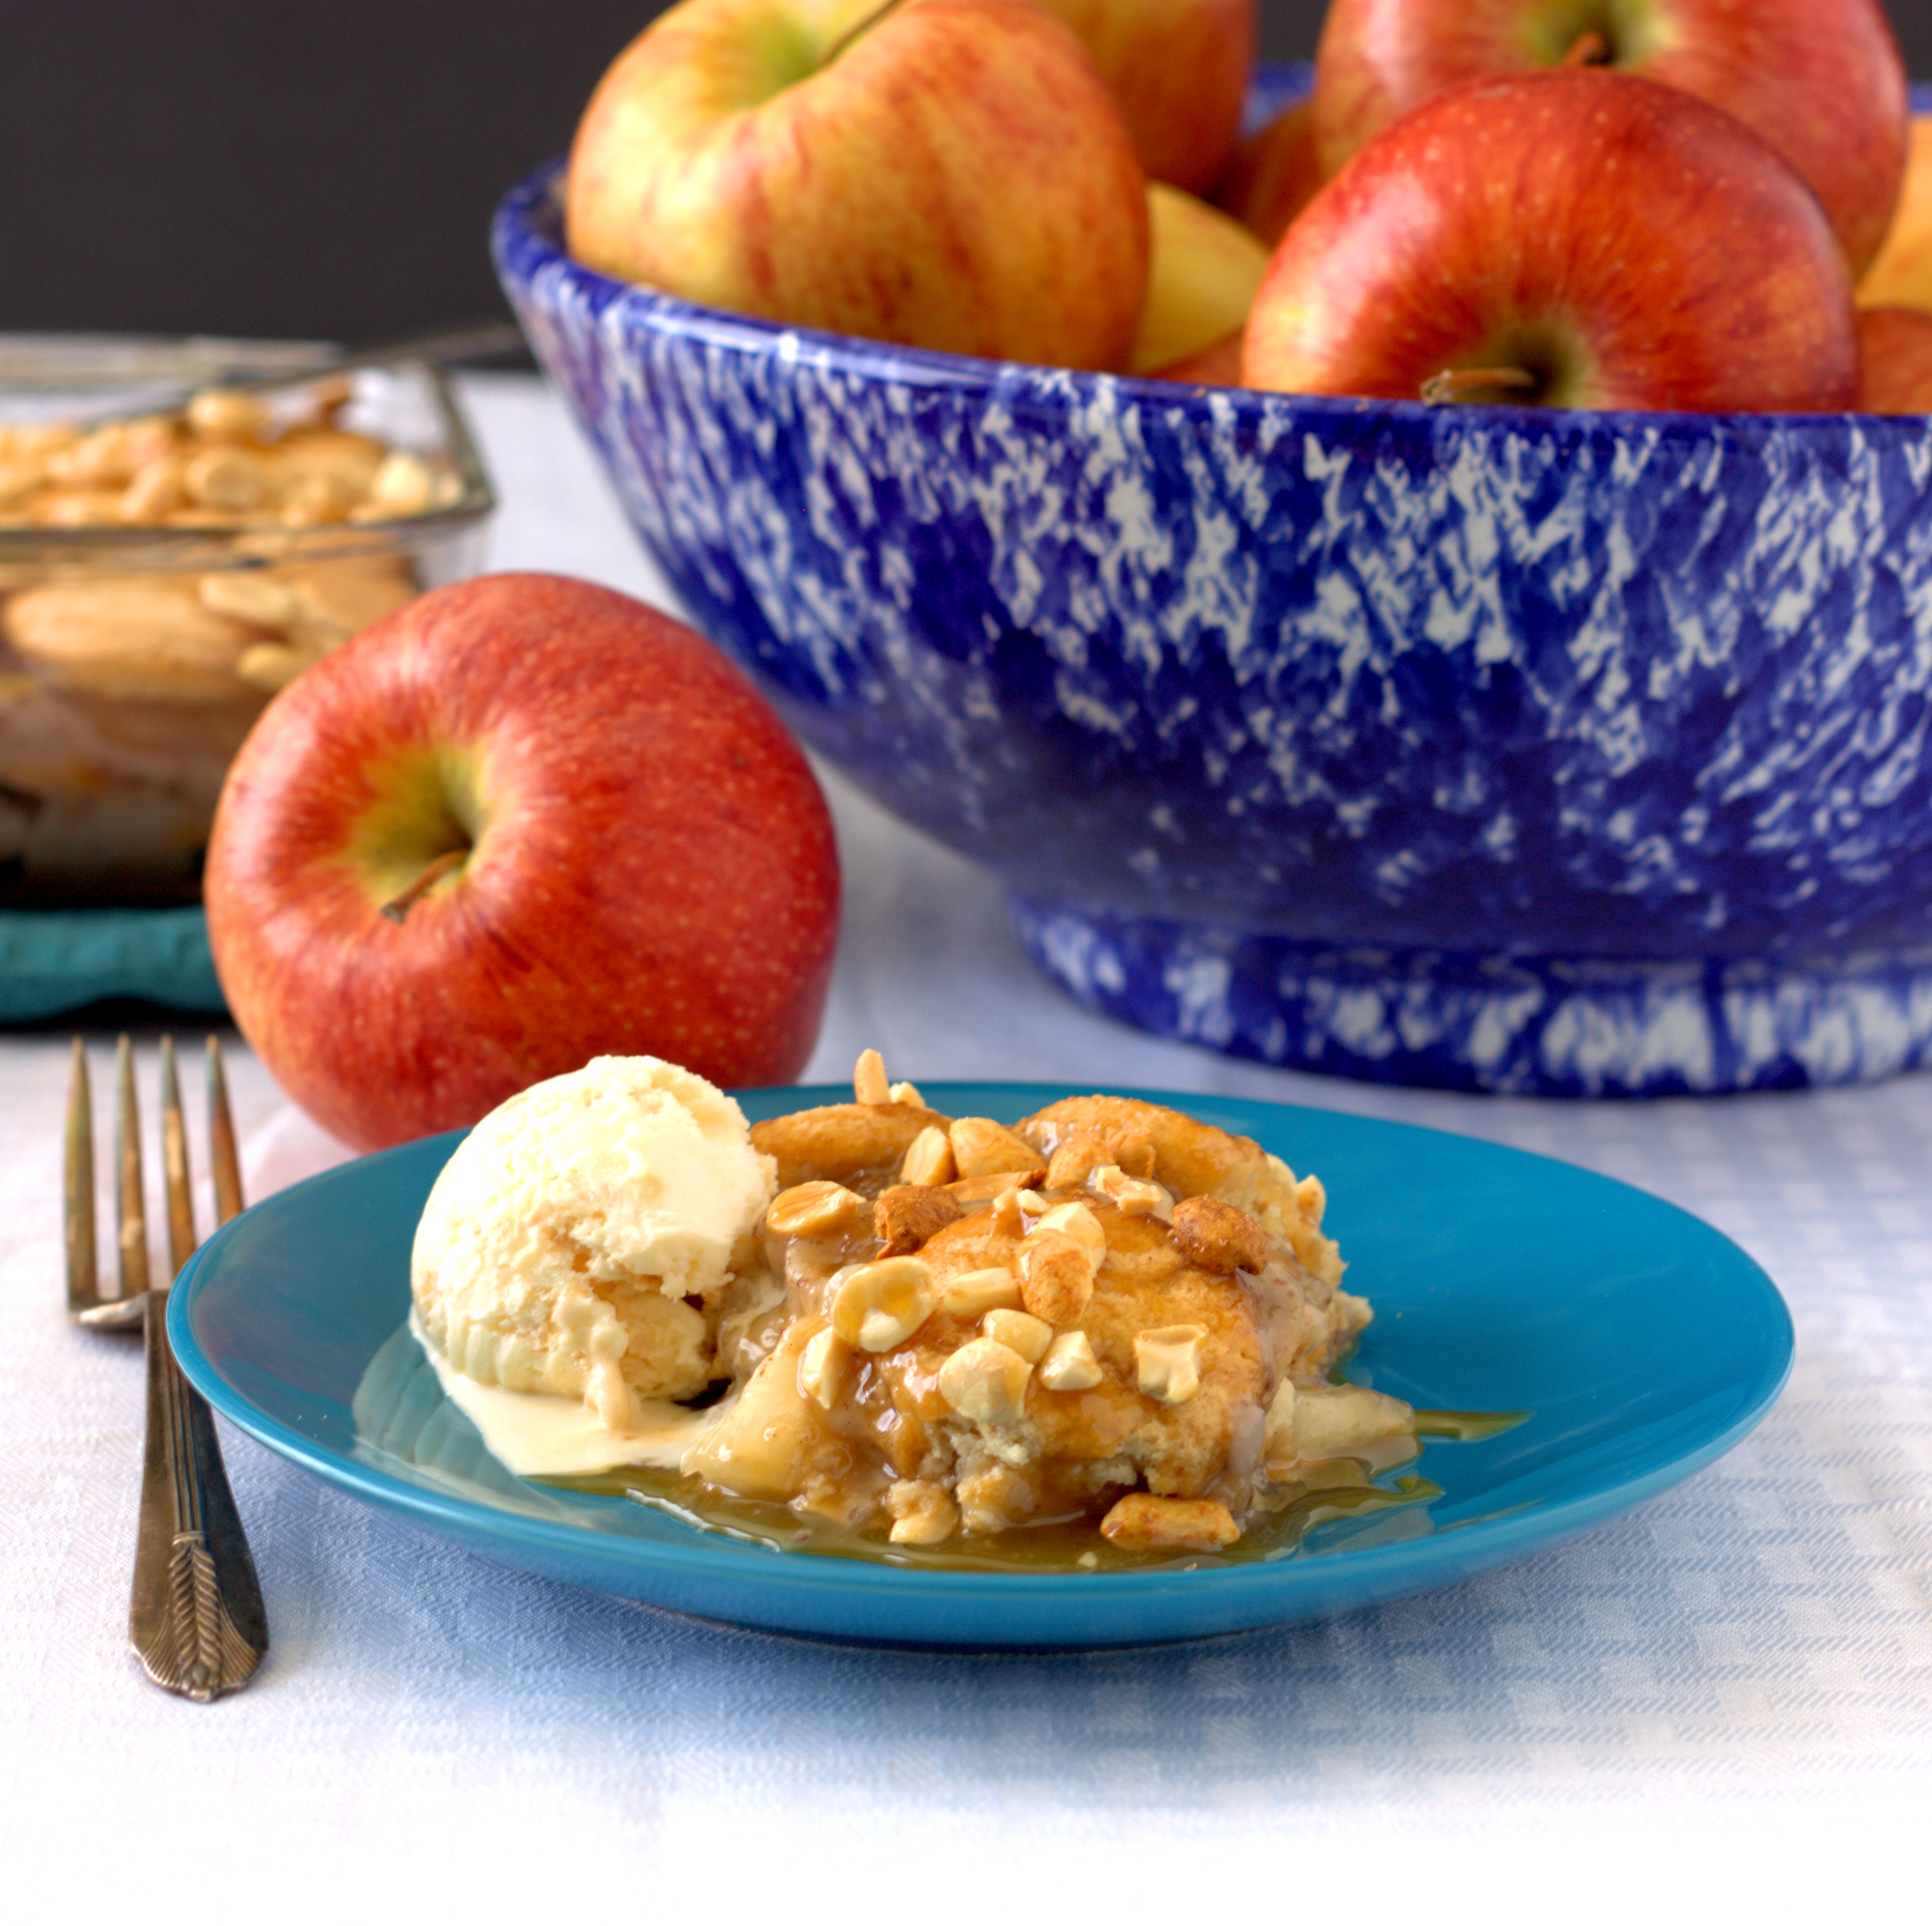
Apple Pie Ice Box Cake
For picnics or other summer gatherings, I find an ice box cake is an easy treat to make. The work is done ahead of time, and they tend to be crowd pleasers. For my latest ice box cake I wanted to make a take on an American classic – the Apple Pie. This…
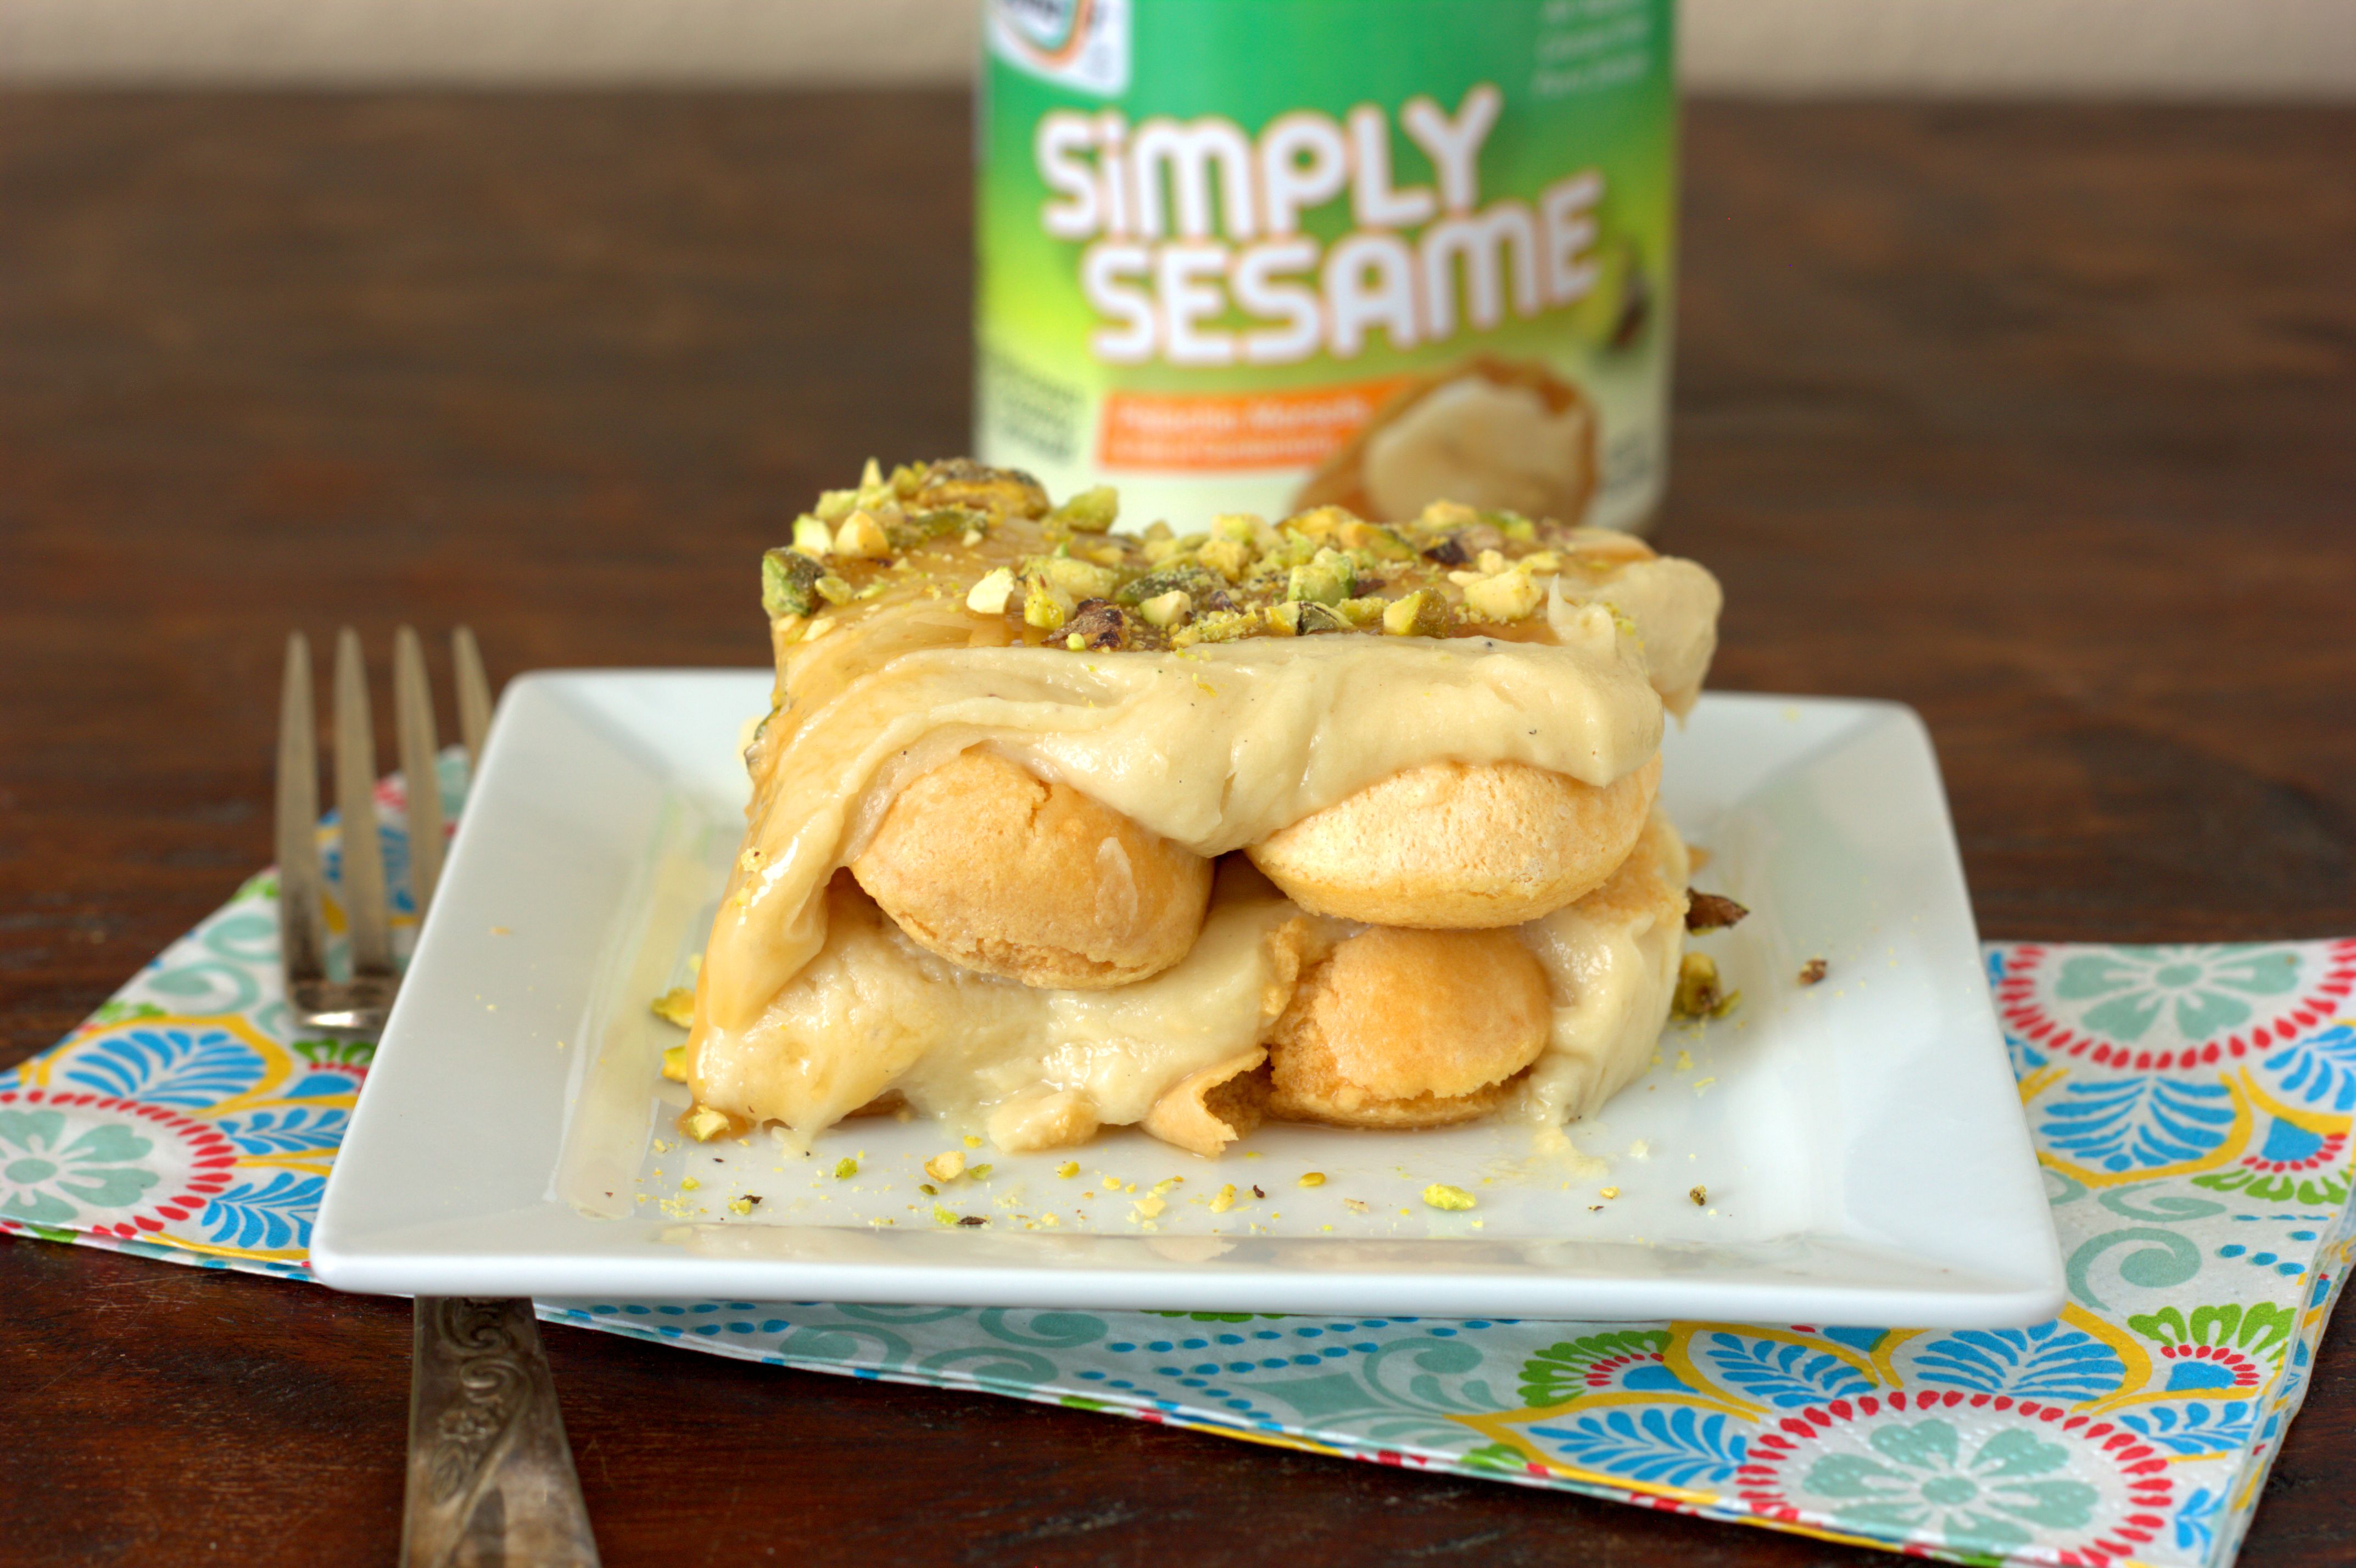
Pistachio Chai Tiramisu
‘Tis the season for baking, so why not combine it with a cooking contest? This week’s recipe was inspired by the Simply Sesame Blogger Recipe Challenge hosted by Simply Sesame. Simply Sesame sent me their three different flavors of Simply Sesame spread: Pistachio-Cardamom, Vanilla-Almond, and plain. I instantly gravitated toward the subtly exotic…
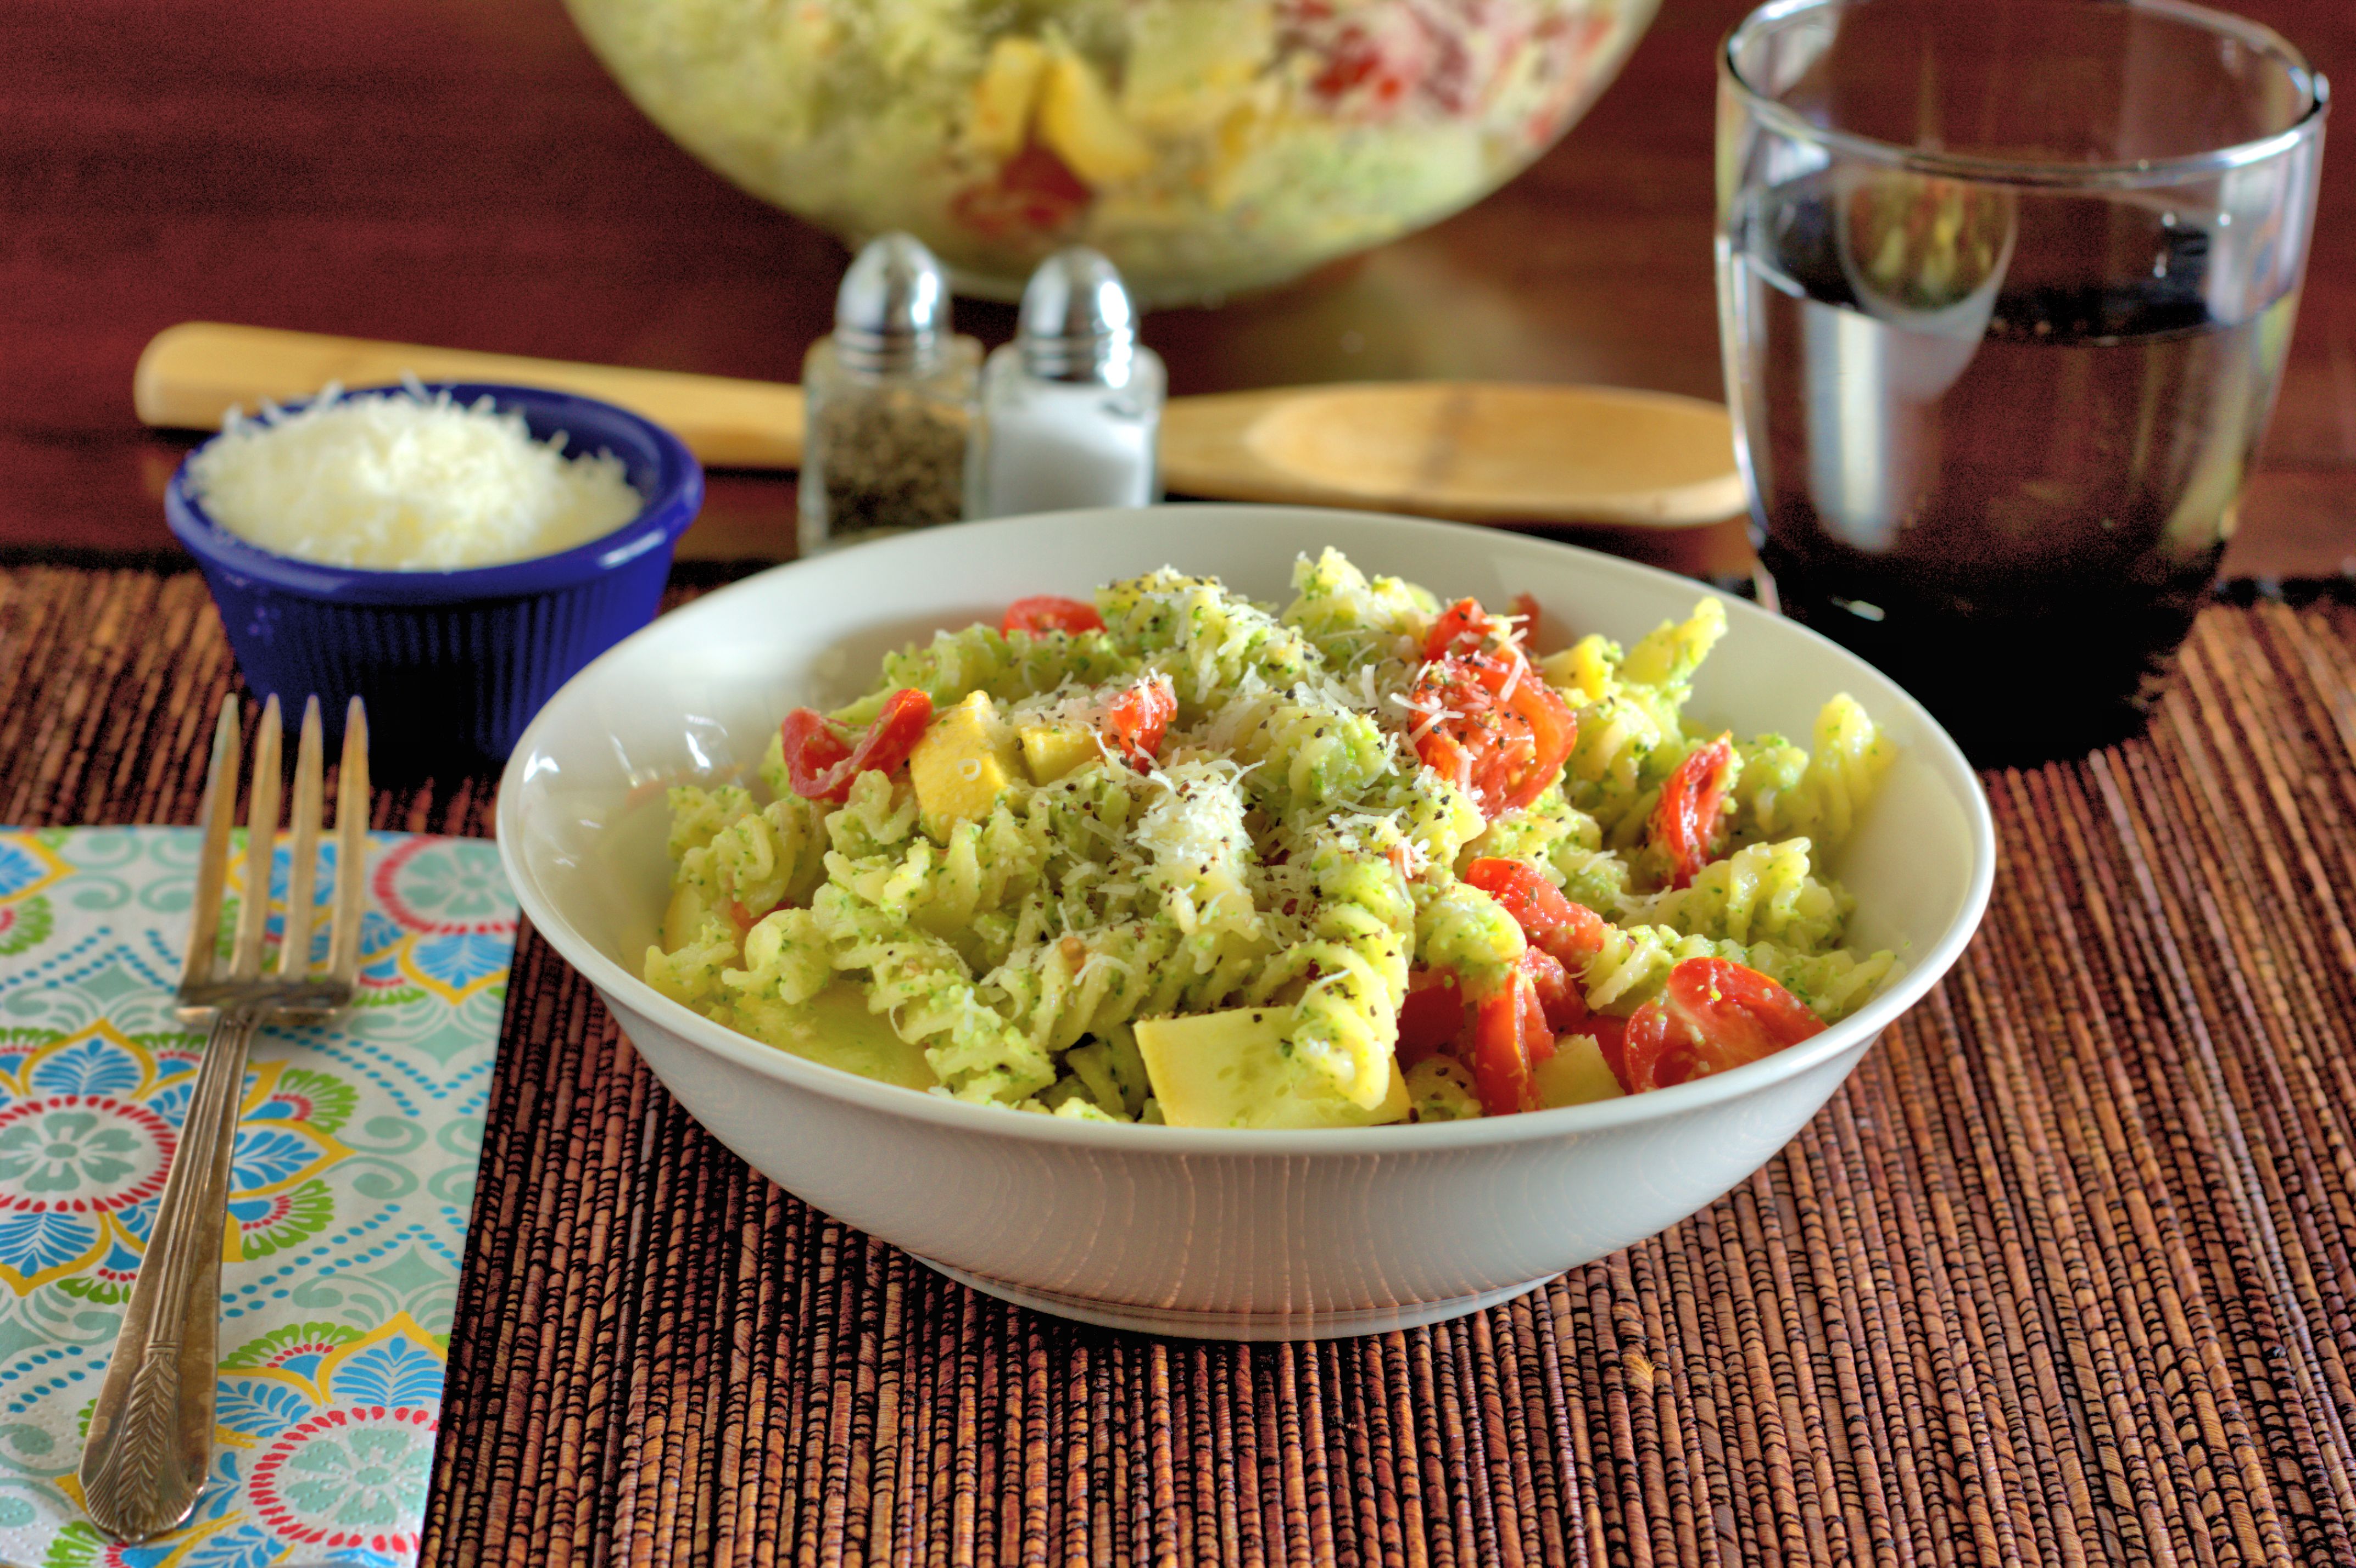
Fusilli Primavera with Broccoli Pesto
In April I wrote about coming up with creative ways to eat broccoli, setting a goal of discussing seven different recipes. Today I want to discuss four more ideas to bring the tally to seven. First up is my most creative twist – Fusilli Primavera with Broccoli Pesto. I subbed in steamed broccoli for…
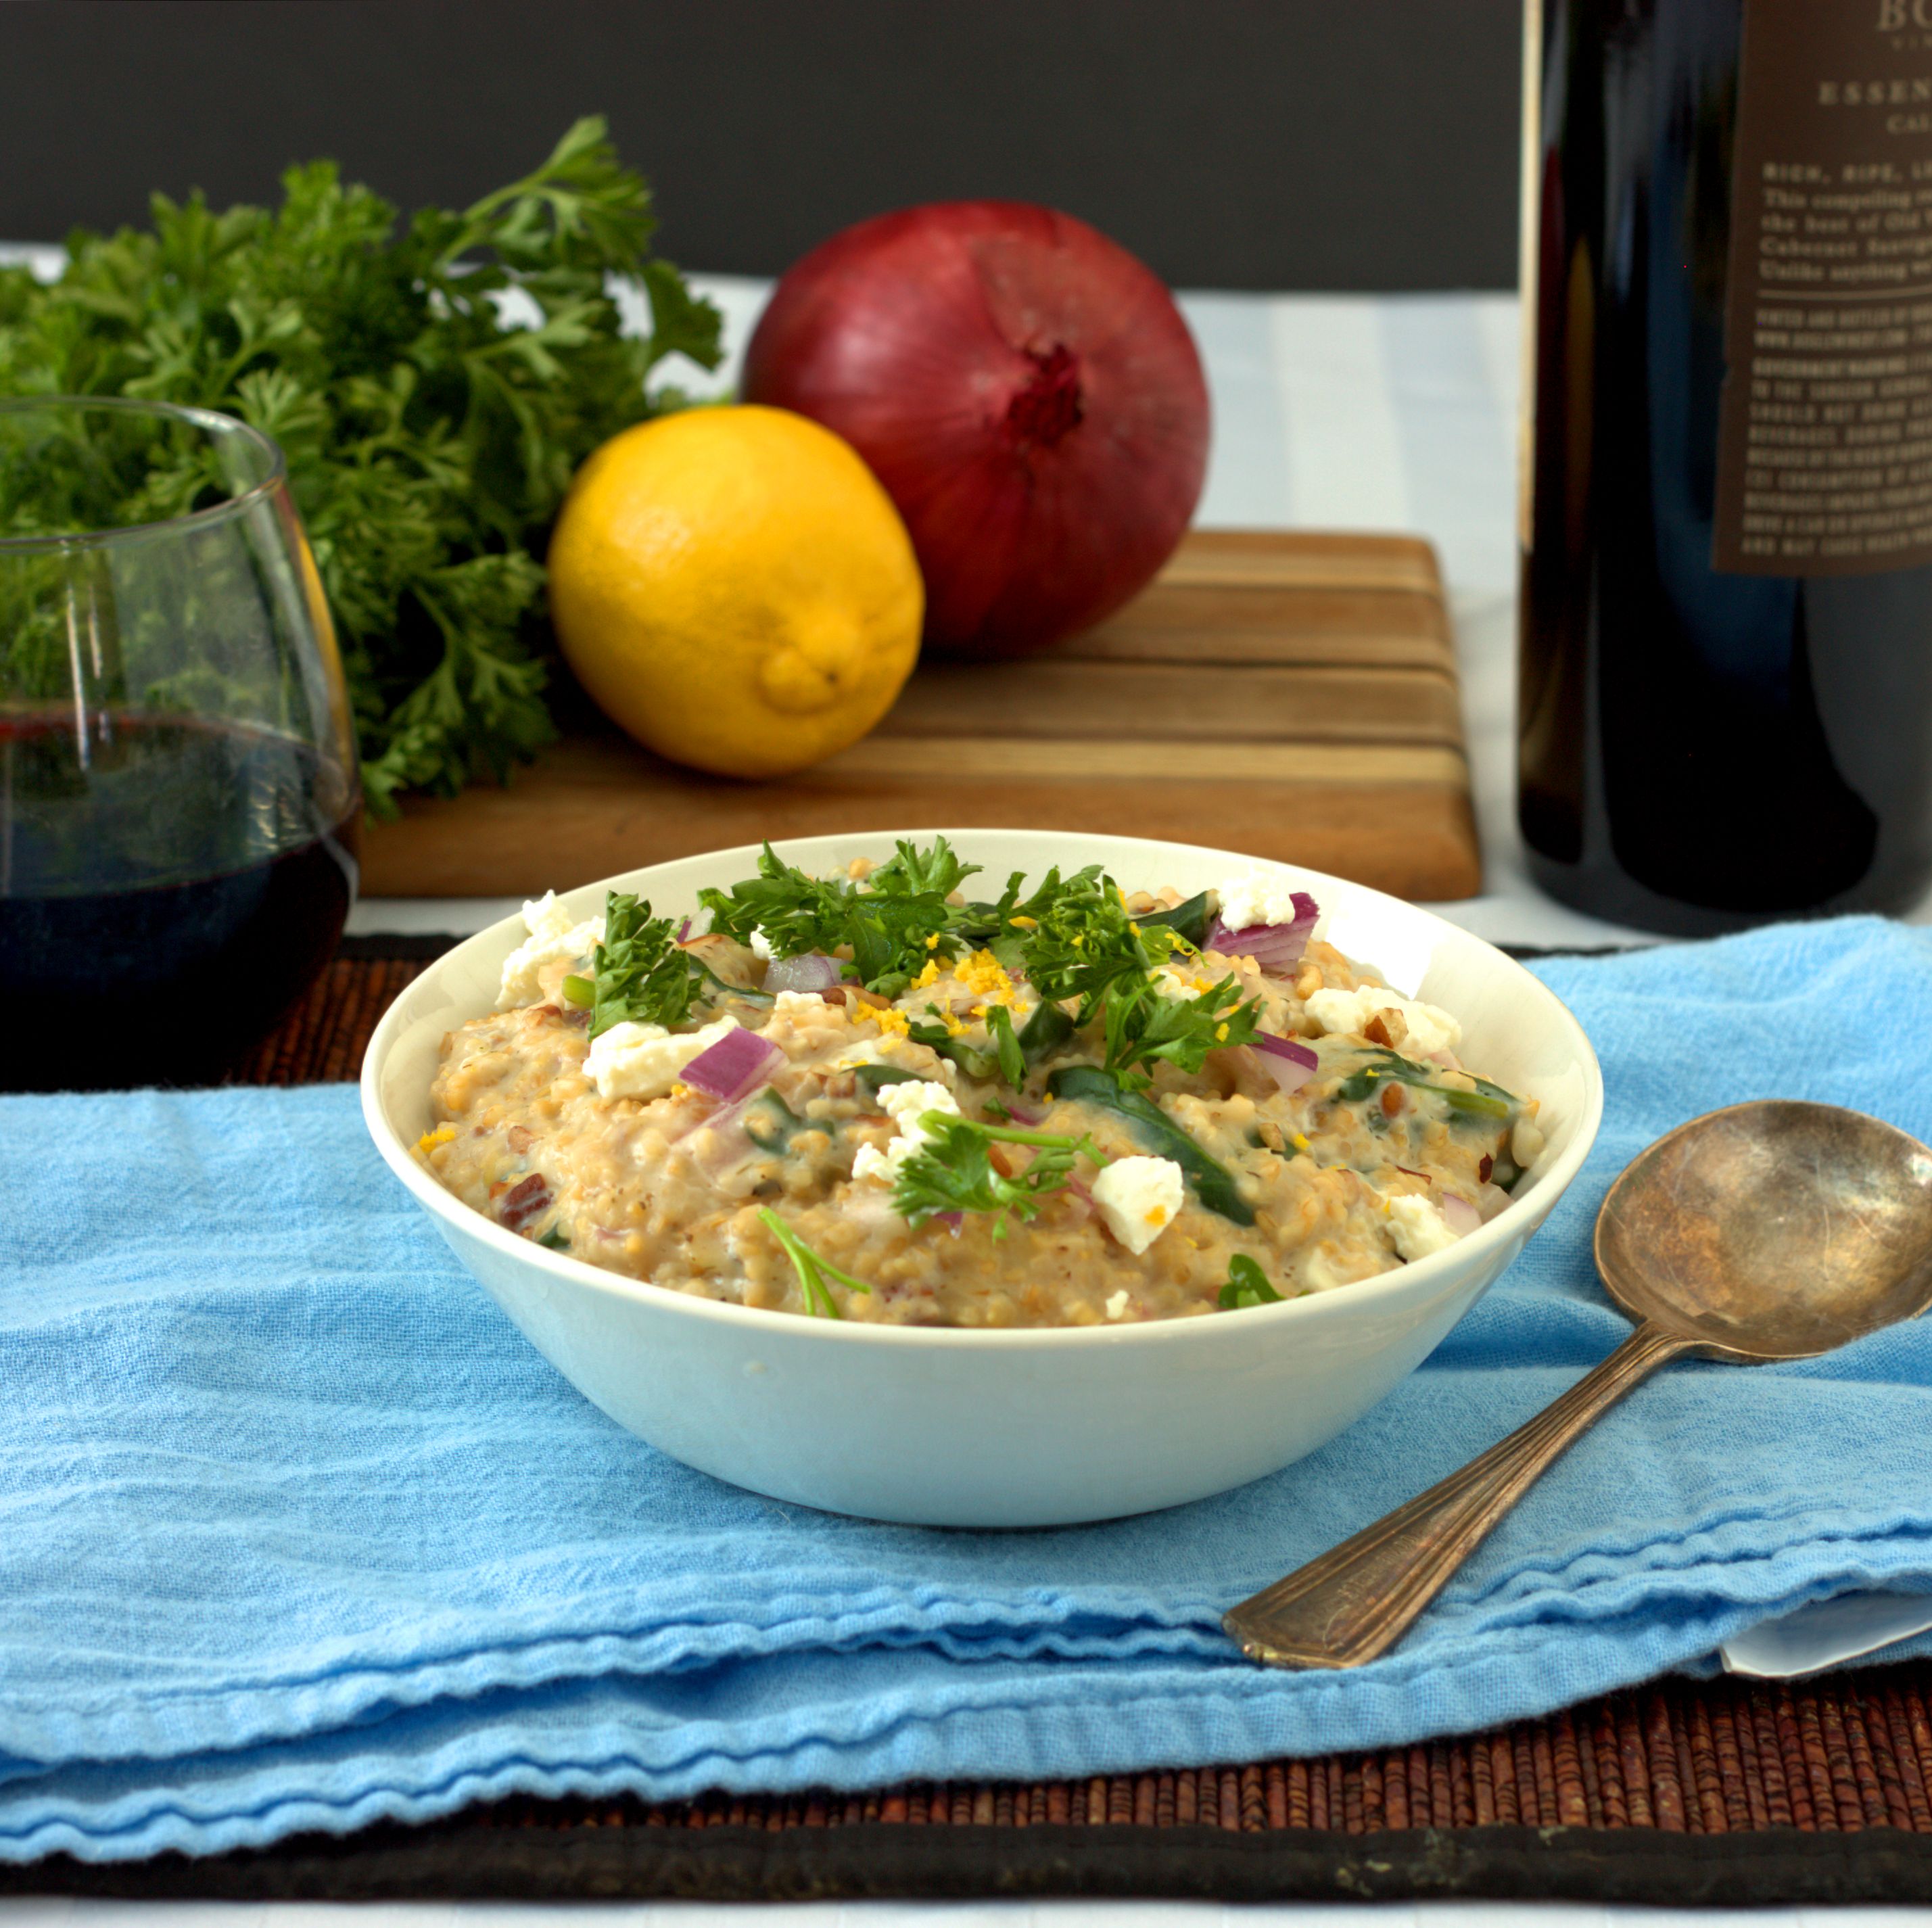
Spinach and Goat Cheese Steel Cut Oat Risotto
I’ve mentioned before that I love when I can use a premixed spice blend as a time saving measuring in my cooking. That is one of the reasons I enjoy the Healthy Solutions Spice Blends Blogger Challenge. I get my creative cooking thinking cap on and experiment with a new spice mix, with…
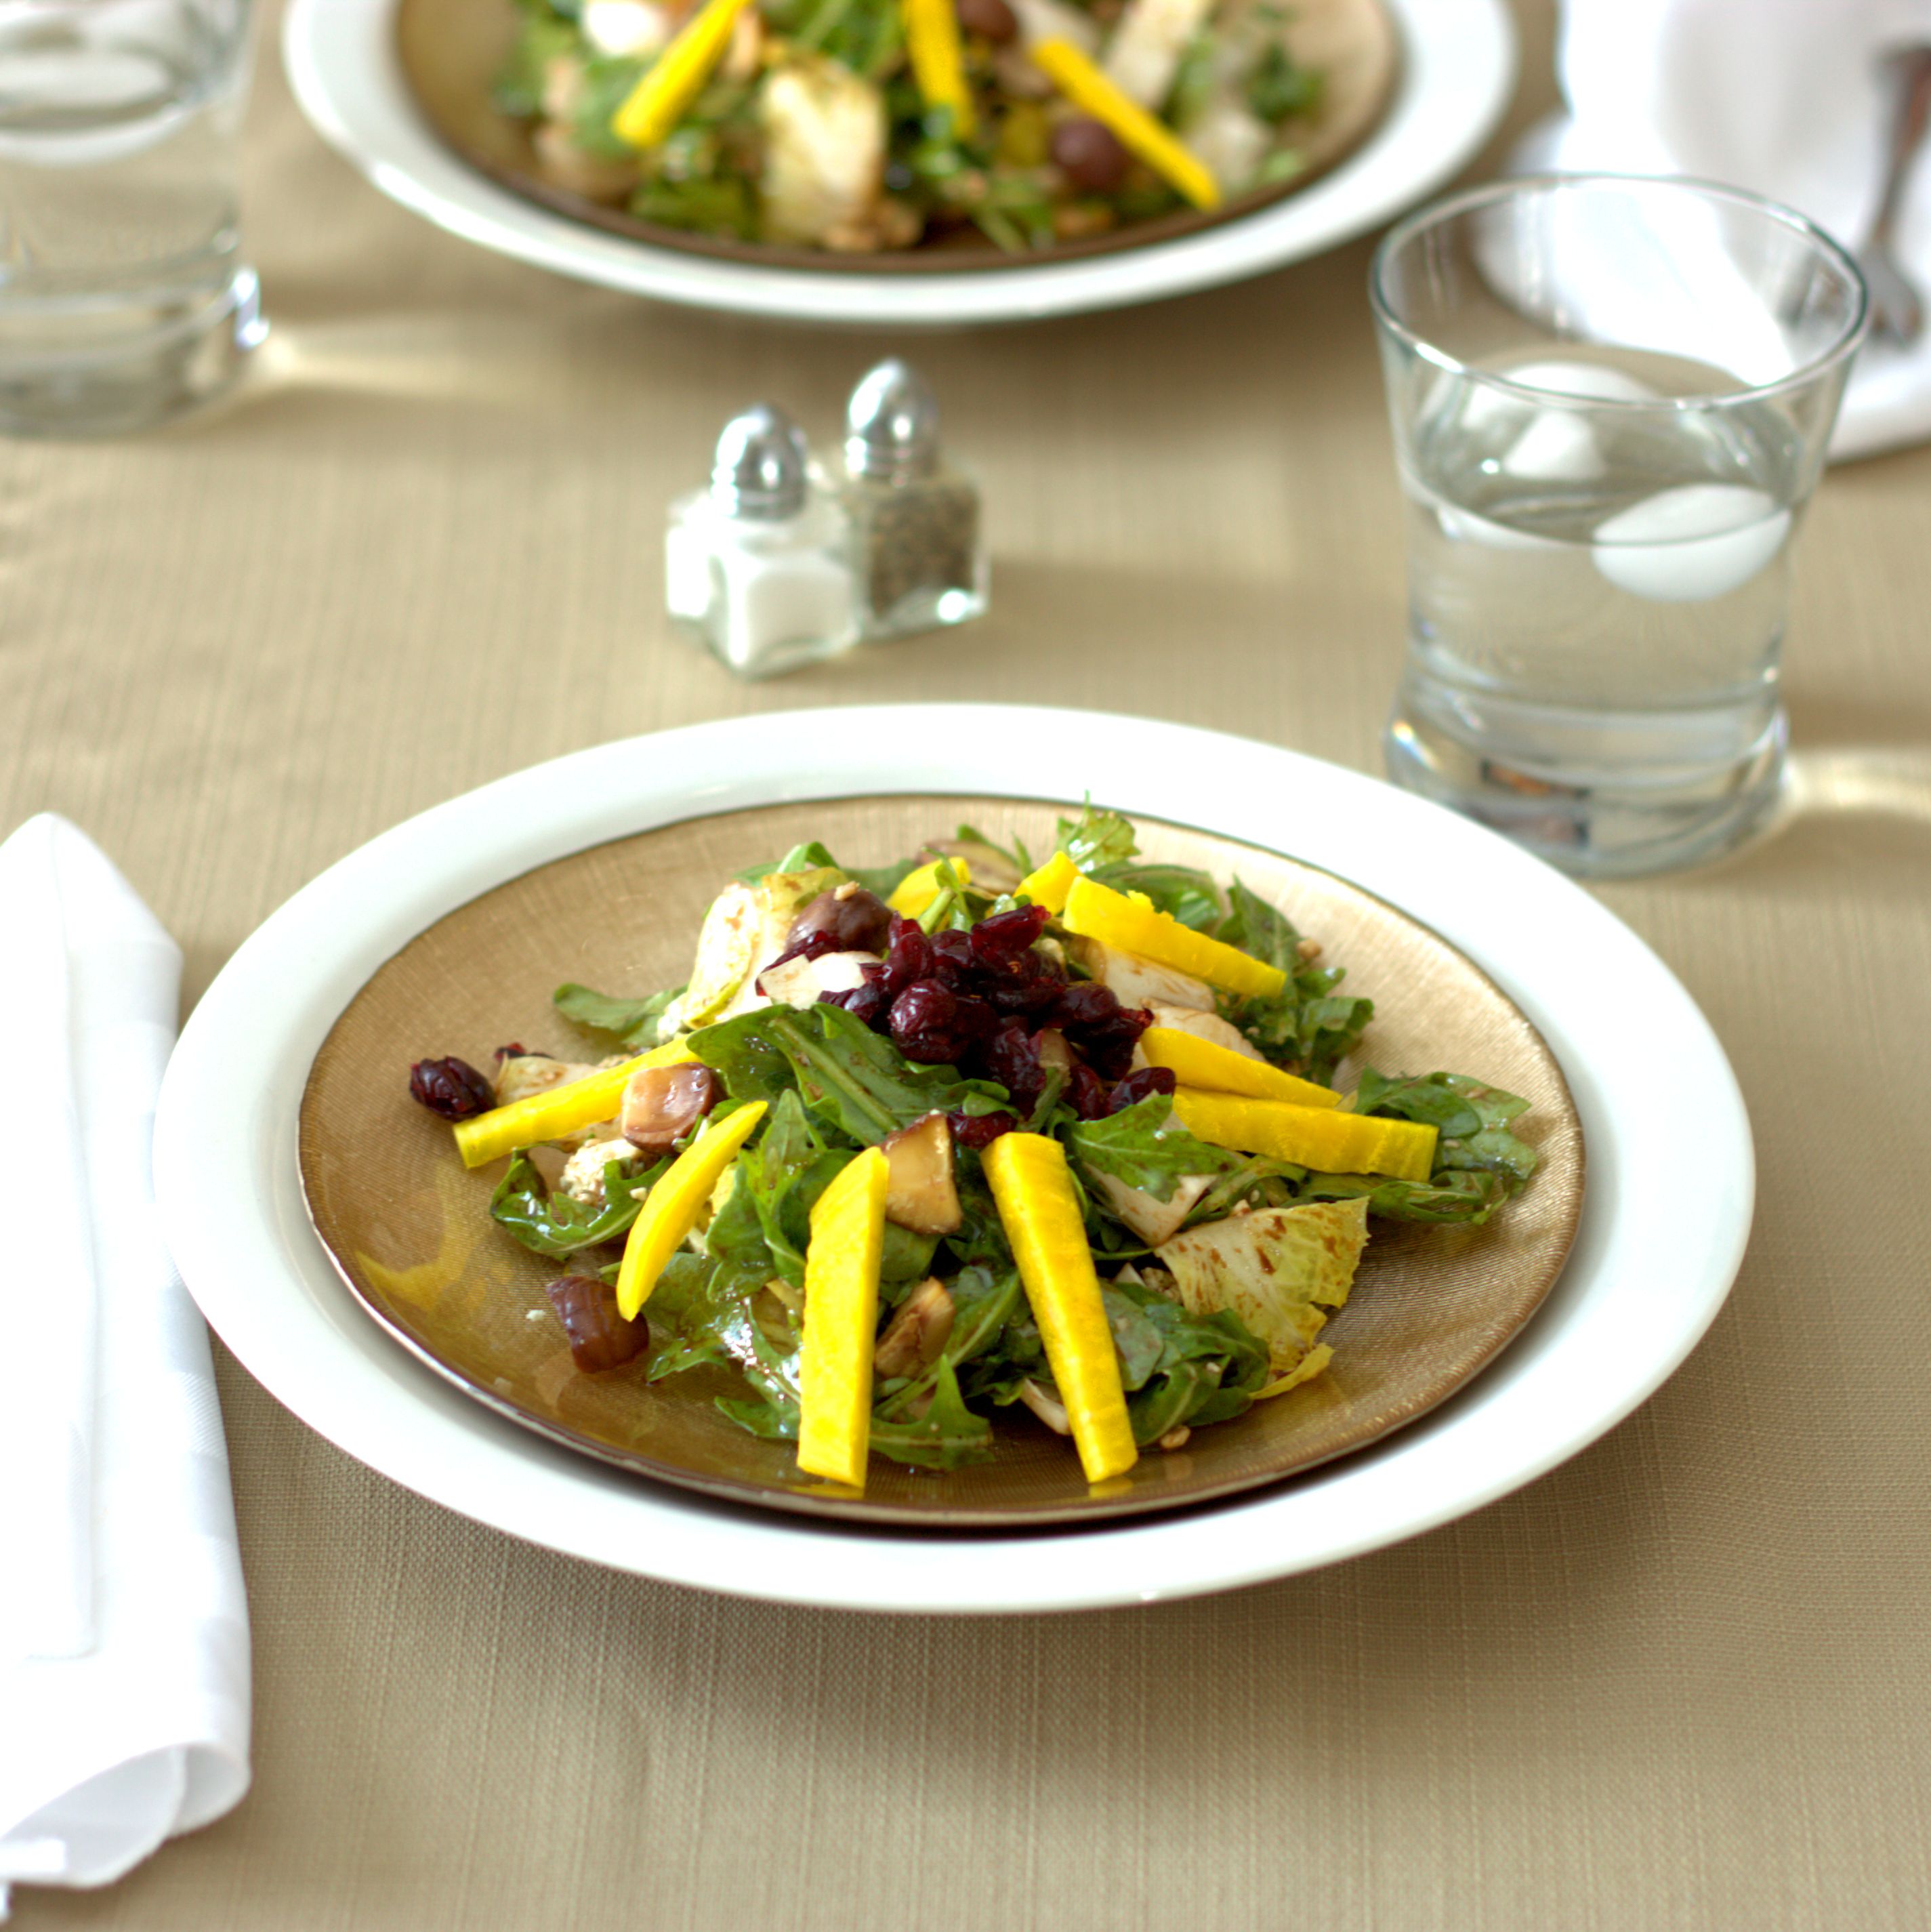
Christmas Chestnut Salad
“Chestnuts roasting over an open fire . . .” croons a popular Christmas tune. Roasting chestnuts is often associated with the holiday season, however I have found the task tedious and more work than it is worth to taste the tender treat. That is why I was thrilled to find the whole roasted…

Spiced Pecans
Ever since I can remember my family has been making these spiced pecans for Christmas. The recipe is a slight adaptation of the one found in the Joy of Cooking cookbook. The most notable change is that we have always made it with four-times the amount of nuts as compared to the original…
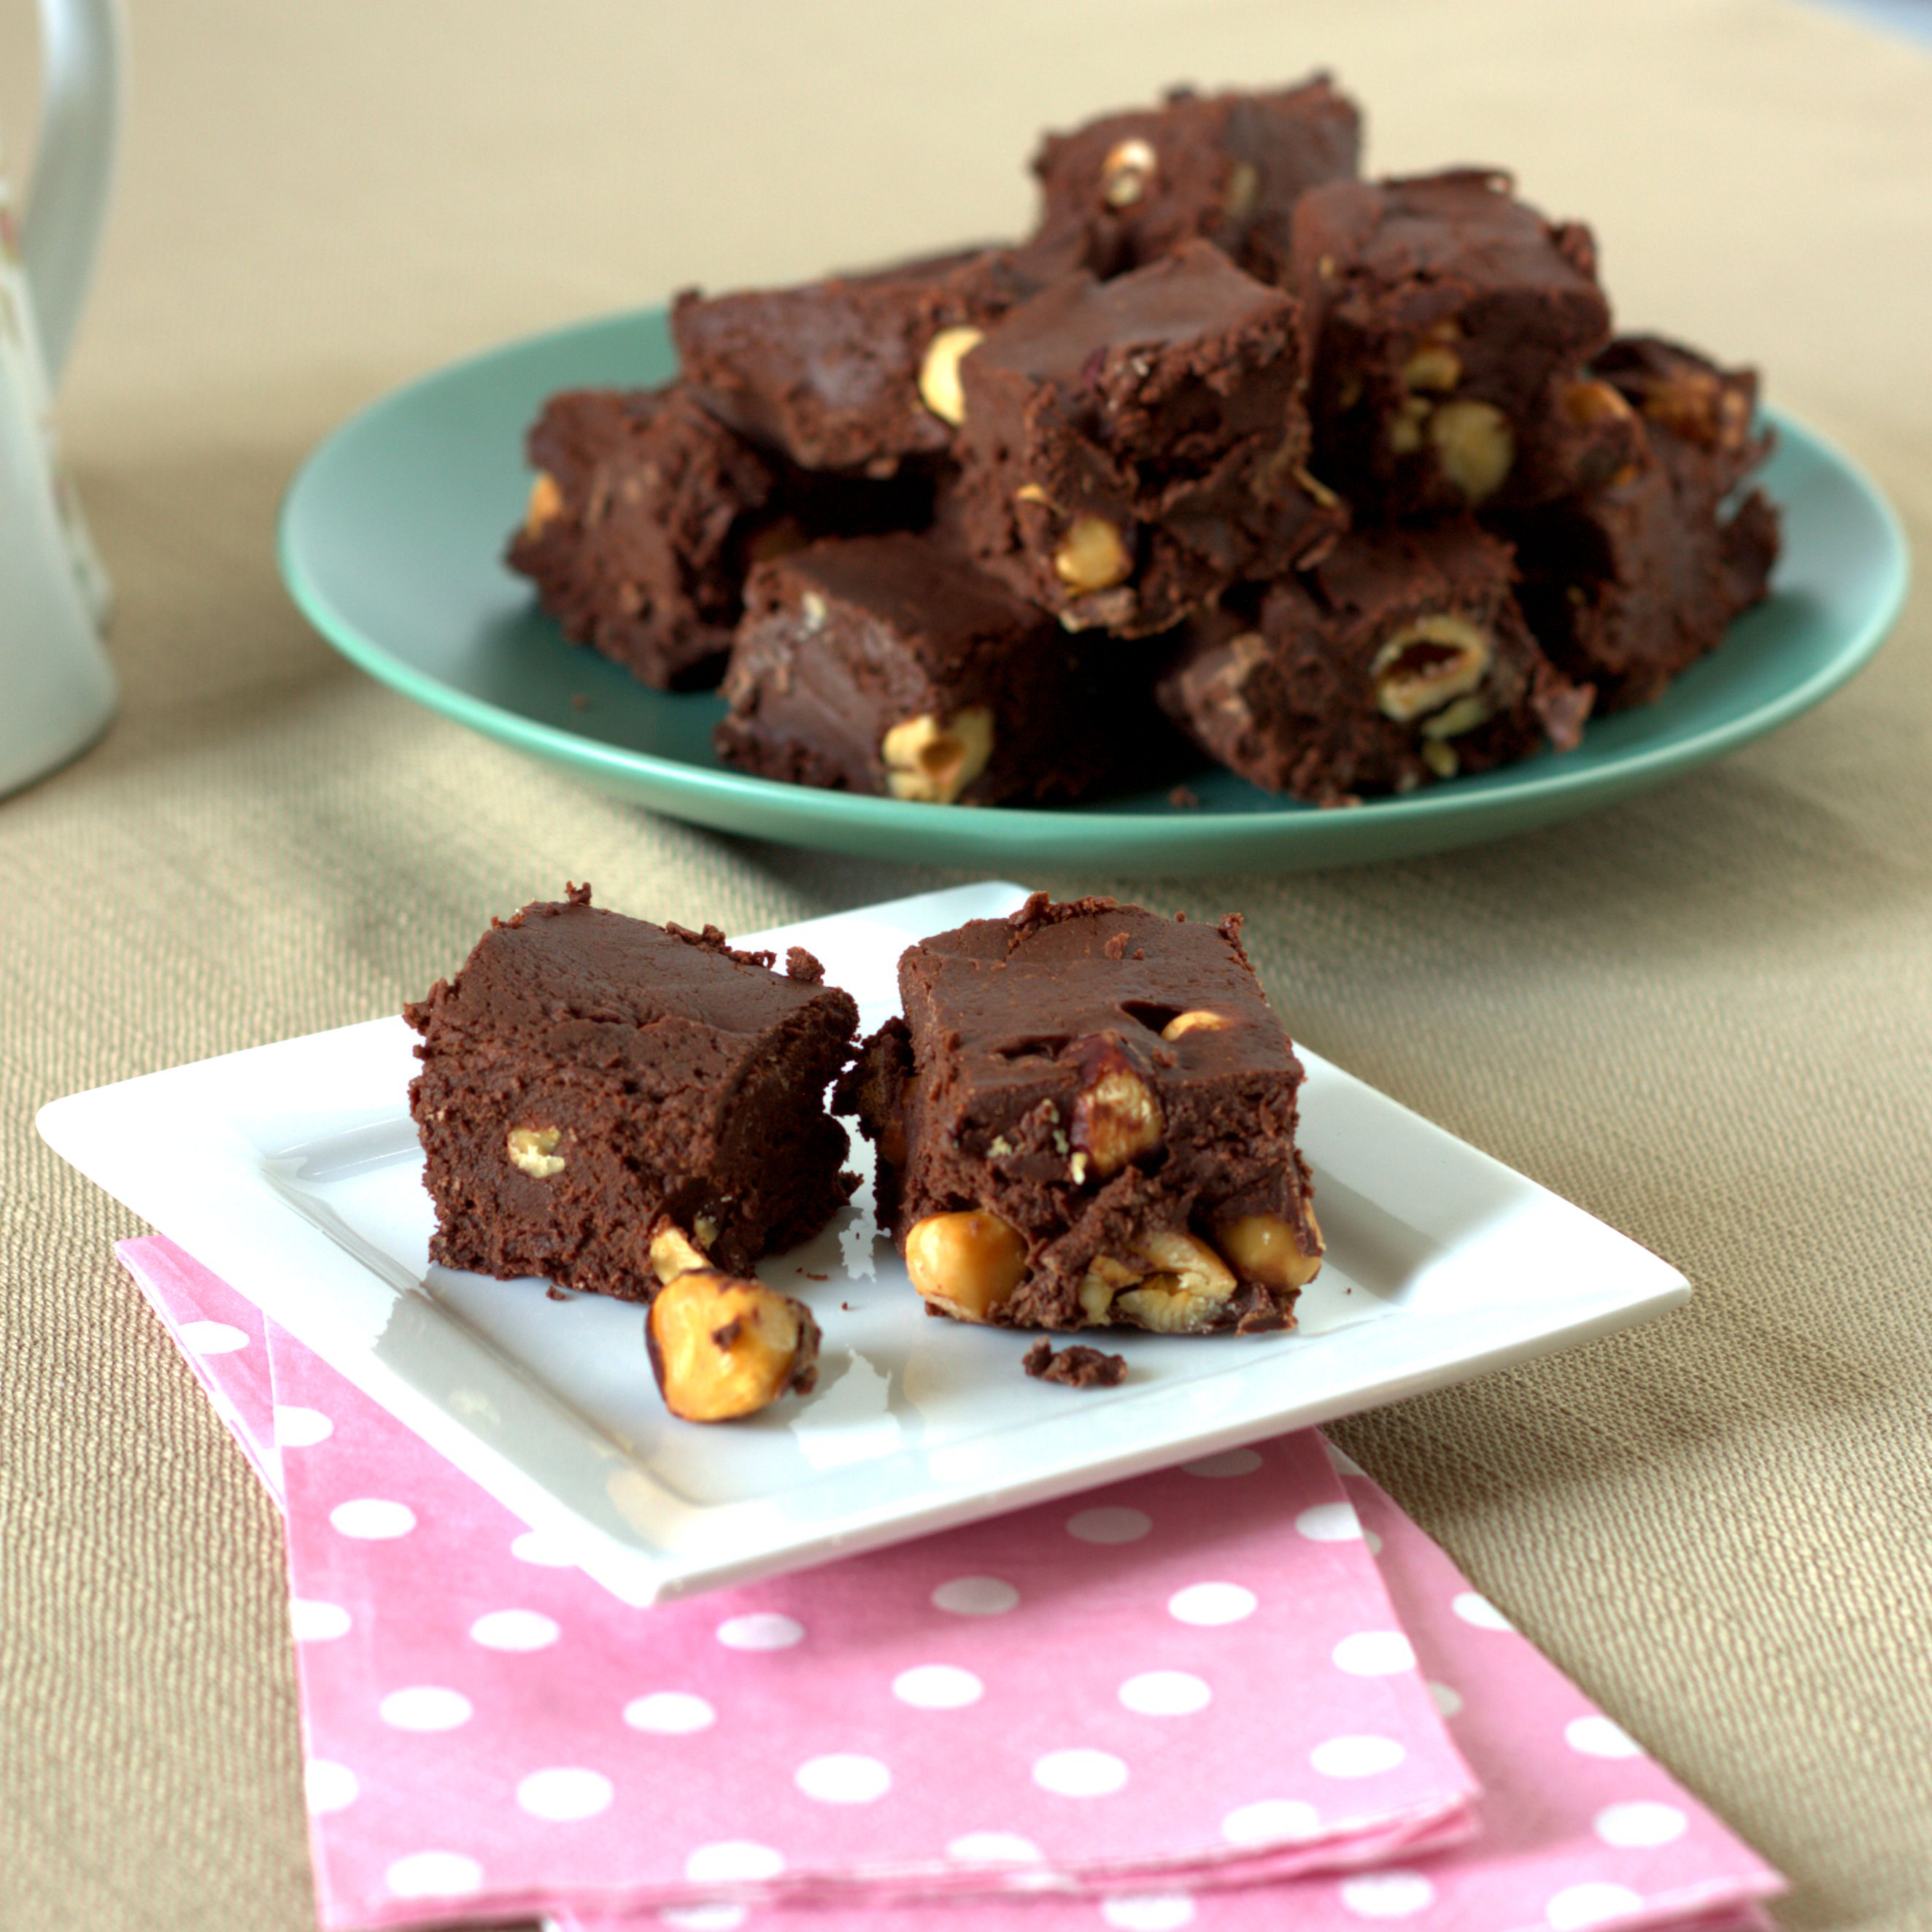
Maple Hazelnut Fudge
In my opinion, it is never too early to start experimenting with recipes for holiday treats and goodies. When time allows, I like to prepare a spread of cookies and invite all my friends over for a cookie & tea party a few weeks before Christmas. With two little ones I haven’t been…